Ubiquiti
It's the Apple of networking equipment
- Ubiquiti NanoStation Nsm5-Flash Notes
- Ubiquiti EdgePoint R6
- Ubiquiti LiteAP Sector
- Ubiquiti LiteBeam AC
- Ubiquiti LTU
- Ubiquiti Nanostation M5
- Ubiquiti Unifi-Ap
Ubiquiti NanoStation Nsm5-Flash Notes
We have been moving towards MikroTik OmniTik as our mesh device. Before using a NanoStation, you should check with us that you are in range of another NanoStation. Some use the NanoStation when they are out of range of the mesh network using the built-in tinc vpn connection.
Don't forget to read our FAQ on the main site.
Also, please fill out the Join form.
When finished, read how to install a NanoStation outdoors
Order a router
- Ubiquiti NSM5 directional 5GHz (~$90 including tax)
For Supernode connections you need a different router (usually LiteBeamAC)
Buy on Amazon:
Ubiquiti NanoStation NSM5
Buy at B&H: (free delivery)
Ubiquiti NanoStation NSM5
Download the firmware and flash your router
NanoStation NSM5 instructions
(for old NSM5s or if you are upgrading see below)
FOLLOW ALL THE STEPS OR YOU MAY PERMANENTLY BRICK THE ROUTER!
- For a new NSM5, download this file to your computer- AirOS5.5 download You MUST downgrade from AirOS 5.6 to 5.5
- Plug an ethernet cable from POE on the power adapter to "main" on the NSM5 (we will switch to "secondary" later)
- Plug from LAN on the adapter to your computer (You may need a USB ethernet adapter)
- Turn off Wi-Fi on your computer
- Open Network Prefs (or equivalent)
- Connect by ethernet using a manual address e.g. 192.168.1.11 with mask 255.255.255.0
- Go to 192.168.1.20 in your browser
- You will get https warning "your connection is not private" or some such
- Click "advanced" and "proceed to 192.168.1.20"
- Enter ubnt, ubnt, USA, [x] agree to terms, login
- On the tabbed panel select "System"
- Click "Upload Firmware: Choose File"
- Select the AirOS file
- Click "Upload"
- There are two loading screens here, and if you don't go through both, you will irreparably break the router.
- Wait until it reboots
- Make sure you are now running 5.5.10 and NOT 5.6.x. Seriously. Read this. Double check. Triple check. If not, you'll break the router.
- Download our firmware- NSM5 XW download
- Go to 192.168.1.20, login and select "System" again
- Click "Upload Firmware: Choose File"
- Select the M5-XW factory image you downloaded
- Click "Upload"
- You will get a "third-party" warning. Ignore this and click "Update"
Wait ten minutes or so. It now has a SSID name like "nycmesh 1a2b" and a random IP of the form 10.x.x.x
-
Plug an ethernet cable from LAN on your current router to LAN on the power supply, and from POE to the secondary input on the NanoStation.
-
Email us and we will check that everything is working and add you to the mesh. You must do this as we manually configure the tinc tunneling for each newly flashed router.
You must also install a watchdog script to keep the network stable. Here are the instructions. Email us if you are not comfortable doing this. This script will be included in the next version of our firmware.
You're done! Now your router is flashed, read how to install a NanoStation
Upgrades
Upgrades are for when your router is already running nycmesh/qMp or another version of OpenWrt.
WR842N upgrade download
WDR3600 upgrade download
NSM5-XW upgrade download
Older (2014 or earlier) XM NSM5s
NSM5-XM download
NSM5-XM upgrade download
Firmware
Our firmware is based on qMp, which is an OpenWrt package using BMX6 meshing protocol. Thanks to Roger at qMp for all of his help.
Am I on the mesh?
After you successfully flash your router and you have emailed us, and we have added your tinc tunneling key, you should be on the mesh. If you re-flash your router (not usually necessary) you will have to email us again so we can add your new tinc tunneling key. Emailing us also lets us know who's router was just flashed.
A quick test to see if you are on the mesh is to go here- http://10.100.4.10/
This URL should resolve after an hour or so of being online-
http://wiki.mesh/
Here are our old TP-Link instructions in case you find an old TL-WR842N on ebay-
TP-Link instructions
- Click to download the firmware to your computer-
TL-WR842N download (For upgrades see above) - Connect to the router via Wi-Fi. It has a name like "TP-LINK_ABC123"
- Enter the "wireless password/pin" that is printed on the bottom of the router e.g. "12341234"
- In your browser, go to 192.168.0.1
- Enter name: admin, pwd: admin
- Click System Tools>Firmware upgrade
- Click "choose file" and select the image you downloaded and click "upgrade"
Wait ten minutes or so and connect to the router via Wi-Fi. It now has a SSID name like "nycmesh 1a2b" and a random IP of the form 10.x.x.x
-
Plug an ethernet cable from LAN on your current router to the blue WAN on the TP-Link.
-
Email us and we will check that everything is working.
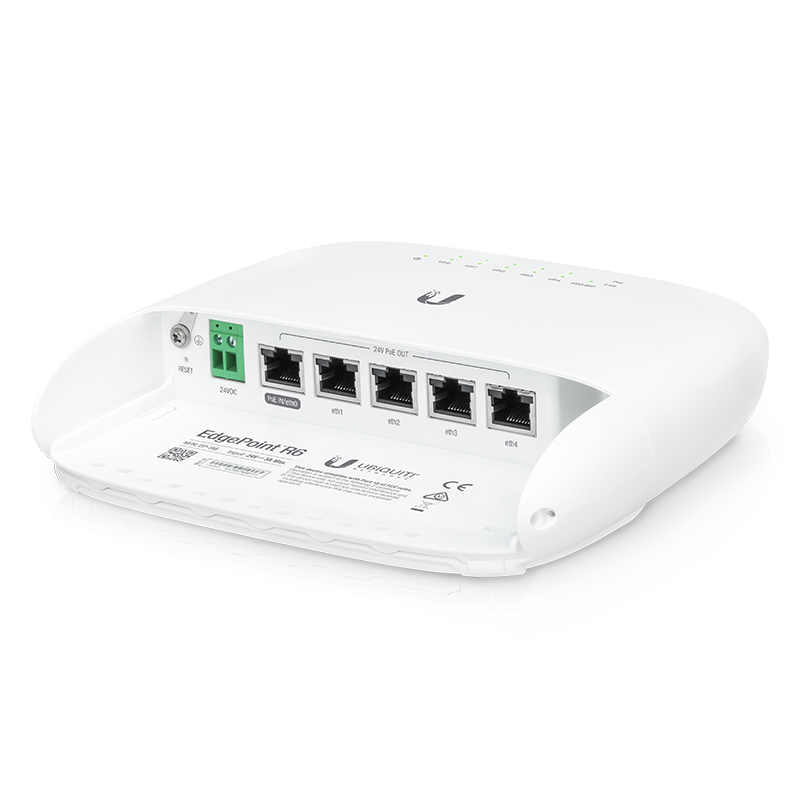
Ubiquiti EdgePoint R6
The EP-R6 is an outdoor rooftop switch/router with 6 ports (5 GigE, 1 SFP). It supports PoE, but only Ubiquiti's 24v Passive PoE style, not any of the fancier types.
It can be configured in switch mode (just a switch, with a management console) or routing mode (hub node setup, BGP, etc).

Device specs are available at store.ubnt.com.
Reset
To factory reset an EP-R6, press and hold the reset button, by the ethernet plugs, for about 10 seconds until the eth4 LED begins to flash, then release the button. The device will reboot and reset.
Or, reset it via the CLI by running the following commands:
sudo cp /opt/vyatta/etc/config.boot.default /config/config.boot
reboot
Connecting
The EP-R6 has a Web GUI and CLI.
The initial IP address out of the box is 192.168.1.1, the Web GUI is at https://192.168.1.1 Set you computer's local IP to something similar ( 192.168.1.5 ), and connect to switch on port eth0.
Although there is a Web GUI, using SSH can allow for a much more rapid workflow. If possible, use that.
Here is an example of SSHing to the EdgePoint when it is in factory default mode:
laptop$ ssh -o StrictHostKeyChecking=no ubnt@192.168.1.1
Welcome to EdgeOS
...

ubnt@192.168.1.1's password: ubnt
Linux ubnt 3.10.14-UBNT #1 SMP Wed Nov 11 14:42:04 PST 2015 mips
Welcome to EdgeOS
ubnt@ubnt:~$
From here you can apply commands such as the ones below.
Device idiosyncrasies
Hardware NAT
If using the device as a router in NAT mode ( not router on the mesh ), the default settings will yield a very slow connection.
Hardware NAT should be enabled, which was just possible as of firmware version v1.9.7.
This page at Ubnt discusses more: https://help.ubnt.com/hc/en-us/articles/115006567467-EdgeRouter-Hardware-Offloading-Explained
To enable hardware offload on this model, perform the following commands on the CLI:
configure
set system offload hwnat enable
commit
save
exit
Safely Upgrading Old Devices
As some of these devices can be nearly a decade old (datasheet released in October 2015), you may come across devices with varying versions of firmware. A problem can present itself when you upgrade these older devices to the v2 line of firmware from the v1 firmware without taking the steps to upgrade the bootloader first, which is a manual process that can result in a bricked device (not unrecoverable, but requires disassembly and a TTL serial adapter - best to avoid!).
If you come across such a device, the first thing to do is to upgrade the device to a safe firmware that is new enough to contain the new boot-image but old enough to support devices running the old firmware. v1.10.7 seems to work for this purpose, and its changelog references significant bootloader-related fixes that result in an easier experience.
Once you have downloaded the .tar file, you can use the GUI to upgrade the firmware by uploading the image as described in the documentation. However, to avoid frustration it is recommended to take the steps on checking for free space on the device before uploading the file as the file upload fails uncleanly when there is no space and you may not realize what is going on.
- ssh into the device (ubnt@192.168.1.1, for example)
df -h- check the output and confirm that the root / mount point has enough free space to accept the 70-80MB image you will upload
ubnt@ubnt:~$ df -h
Filesystem                Size      Used Available Use% Mounted on
ubi0_0                  214.9M    141.1M     69.1M  67% /root.dev
overlay                 214.9M    141.1M     69.1M  67% /
...
Uh-oh, looks like we have less than 70M free on the root partition, so uploading the file via the GUI will fail and cause problems. We can solve this by removing the backup firmware first.
show system image, and confirm that there are two images uploaded to the devicedelete system image, and confirm that you want to remove the backup imagedf -h, to confirm that the space has been freed
ubnt@ubnt:~$ show system image
The system currently has the following image(s) installed:

v2.0.9-hotfix.7.5622731.230615.0857 (running image) (default boot)
v1.10.7.5127989.181001.1227

ubnt@ubnt:~$ delete system image
The system currently has the following image(s) installed:

v2.0.9-hotfix.7.5622731.230615.0857 (running image) (default boot)
v1.10.7.5127989.181001.1227

You are about to delete image [v1.10.7.5127989.181001.1227]
Are you sure you want to delete ? (Yes/No) [Yes]: yes
Removing old image... Done
ubnt@ubnt:~$ df -h
Filesystem                Size      Used Available Use% Mounted on
ubi0_0                  214.9M     66.7M    143.5M  32% /root.dev
overlay                 214.9M     66.7M    143.5M  32% /
...
Now you can proceed to upload the firmware via the GUI. Once you reboot, it is time to upgrade the bootloader by SSHing into device again, and it may have prompted you to do this on login:
Linux ubnt 4.14.54-UBNT #1 SMP Thu Jun 15 09:00:10 UTC 2023 mips
Boot image can be upgraded to version [ e52_002_4c817 ].
Run "add system boot-image" to upgrade boot image.
Last login: Wed Dec 31 22:33:11 2014 from 192.168.1.100
ubnt@ubnt:~$
You can do as instructed and it is recommended to reboot the device before moving onto the next firmware:
ubnt@ubnt:~$ add system boot-image
Uboot version [e52_001_1e49c] is about to be replaced
Warning: Don't turn off the power or reboot during the upgrade!
Are you sure you want to replace old version? (Yes/No) [Yes]: yes
Preparing to upgrade...Done
Copying upgrade boot image...Done
Checking boot version: Current is e52_001_1e49c; new is e52_002_4c817 ...Done
Checking upgrade image...Done
Writing image...Boot image has been upgraded.
Reboot is needed in order to apply changes!
Done
Upgrade boot completed
ubnt@ubnt:~$ reboot now

Broadcast message from ubnt@ubnt (pts/0) (Wed Dec 31 22:41:05 2014):

The system is going down for reboot NOW!

Connection to 192.168.1.1 closed by remote host.
Once it comes back, you can now upgrade to a v2 firmware using the GUI without any risk of bricking. Be sure to check for free space and remove the old backup firmware again before uploading the new .tar file by following the above instructions again.
Common Configs
Switched Mode (Extend an OmniTik)
To convert the EP-R6 to switched mode, there's now a simple wizard in the GUI to help.
A common use case for the EP-R6 as a switch is to add more PoE-capable ports to an OmniTik router on the roof. In order to preserve isolation between these ports and on the OmniTik, we need to make the switch VLAN-Aware. The following instructions assume the OmniTik has been configured with the standard configuration and IP allocations.
1. Start the Wizard
In the web interface, navigate to the "Wizards" tab on the top right of the screen. On the left sidebar, click "Switch". Choose Static IP. You are probably connected directly to the switch right now, so you don't want to lose access to it while there's no DHCP server!
Log into the OmniTik you are planning on connecting the switch to; we are going to find an unused IP in its /26 subnet. On the left sidebar under IP->DHCP Server, click the "Leases" tab, and hit "Add New". Type in the address you are allocating, uncheck "Enabled", and type nycmesh-xxxx-epr6 in the "Comment" (where xxxx is the network number to which this will be attached).
Type this address into the switch with a /26 subnet with the OmniTik's /26 IP Address as the gateway. Use 10.10.10.10 as the DNS server.
2. Set the VLANs on the EP-R6
Under "VLAN Aware", check "Enabled". Depending on which port will be connected to the OmniTik (the "trunk" port), you will set the VLANs using a combination of the OmniTik's and the EP-R6's port numbers.
Example: EP-R6 is plugged into Port 3 on the OmniTik, and we want to isolate Ports 1-5 on the EP-R6.
eth0: vid 301,302,303,304,305
eth1: pvid 301
eth2: pvid 303
eth3: pvid 303
eth4: pvid 304
eth5: pvid 305
In layman's terms, The PVID tags the port and VID tells where to send the tagged traffic out. The first digit will be the port number of the OmniTik, and the last digit will be the port number of the EP-R6. After setting up your credentials you can hit apply and reboot the router.
3. Add the VLANs to the OmniTik
Because eth0 did not have a PVID set, you should be able to access the switch using its new IP address without additional hardware. However, we need to configure the OmniTik to receive the tagged traffic and add them to the mesh bridge.
Name: ether1.301
VLAN ID: 301
Interface: ether3
Hit OK to save. Once you do this for each port on the EP-R6, you can navigate to the left sidebar and go to Bridge. Under the "Ports" tab, click "Add New" for each VLAN you are configuring. Select the Interface you just created (ether1.301) and the Bridge mesh. Hit OK, and do this for each VLAN interface.
4. Test it!
The easiest way to test your configuration is by connecting a DHCP client (like a router) to the port and testing traffic flow. Plug it into any of the configured ports of the EP-R6, where you will see the port turn purple, orange, or green on the top of the EP-R6's GUI (purple:10Mbps, orange:100Mbps, green:1G).
Routed Mode ( NYCMesh Hub Node - BGP )
You will need to know the following to be able to continue: BGP ASN - Autonomous System Number within the network Gateway Node Y/N - Are we going to be a gateway exit node Peers ASN and IP - What are our Peer ASN and IP that we will connect with Local Subnet - What local network will we have? One? Many?
Configuration: The following sections below may be used in-part or in-whole depending on the need:
- Route Filters / Prefix list - Allows or denies certain ranges from the network. Good for ensuring functionality
- The current filter set for NYCMesh can be found at Filter
Example Parameters: ASN: 65012 Gateway: N Peer ASN: 65010 Peer IP: 10.180.14.1 Local Subnet: 10.70.50.0/24
configure

## Filters ##
set policy prefix-list nycmeshprefixes rule 10 prefix 10.0.0.0/8
set policy prefix-list nycmeshprefixes rule 10 ge 22
set policy prefix-list nycmeshprefixes rule 10 le 32
set policy prefix-list nycmeshprefixes rule 10 action permit

set policy prefix-list nycmeshprefixes rule 20 prefix 172.16.0.0/12
set policy prefix-list nycmeshprefixes rule 20 ge 24
set policy prefix-list nycmeshprefixes rule 20 le 32
set policy prefix-list nycmeshprefixes rule 20 action permit

set policy prefix-list defaultroute rule 10 prefix 0.0.0.0/0
set policy prefix-list defaultroute rule 10 action permit

set policy route-map nycmeshroutes rule 10 action permit
set policy route-map nycmeshroutes rule 10 match ip address prefix-list nycmeshprefixes

# BGP Config
set protocols bgp 65012
set protocols bgp 65012 neighbor 10.180.14.1 remote-as 65010
set protocols bgp 65012 neighbor 10.180.14.1 soft-reconfiguration inbound
set protocols bgp 65012 neighbor 10.180.14.1 nexthop-self
set protocols bgp 65012 neighbor 10.180.14.1 route-map import nycmeshroutes
set protocols bgp 65012 neighbor 10.180.14.1 route-map export nycmeshroutes

# BGP Network Config
set protocols bgp 65012 network 10.70.50.0/24
set protocols static route 10.70.50.0/24 blackhole

# Save and Reset BGP
commit
save
clear ip bgp all
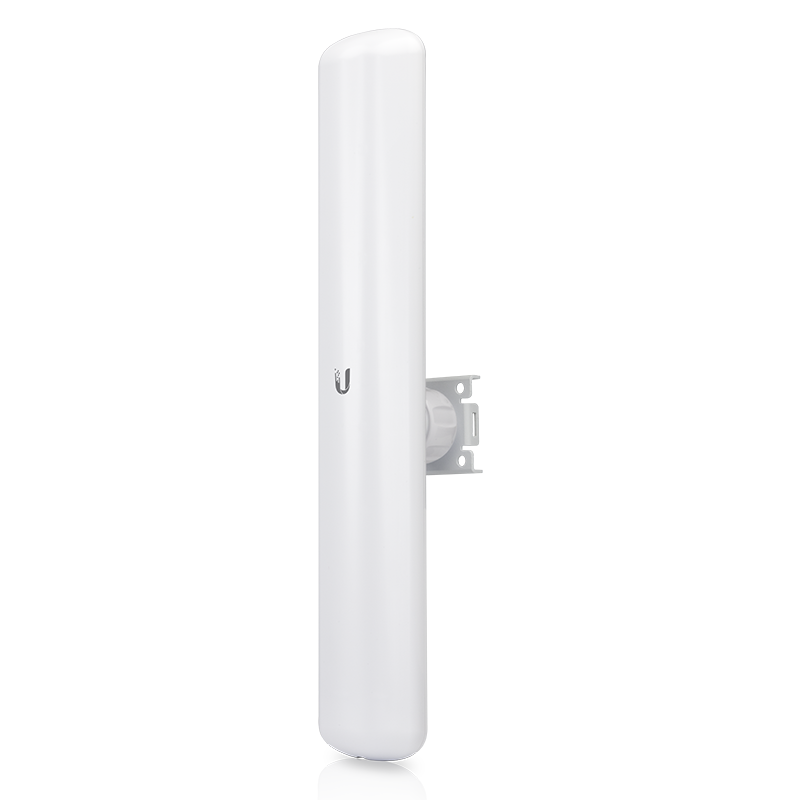
Ubiquiti LiteAP Sector
The confusingly named LiteAP (LAP-120) is a very good, cheap 120' sector antenna. 120' means you need three to get a full 360'. It used to be called a LiteBeam 5AC AP LBE-5AC-16-120, and is still named that on parts of their website.
We use it as a sector antenna for most hub and supernode installs. As with all Ubiquiti gear you need to flash it with the latest firmware first.
The AC in the name is not 802.11ac, it is Ubiquiti's own protocol. These devices can only connect to other Ubiquiti "AC" devices like the LiteBeam we mount on everyone's roof.
Device specs are available at ubnt.com.
The default IP is https://192.168.1.20/ with name:ubnt pwd:ubnt
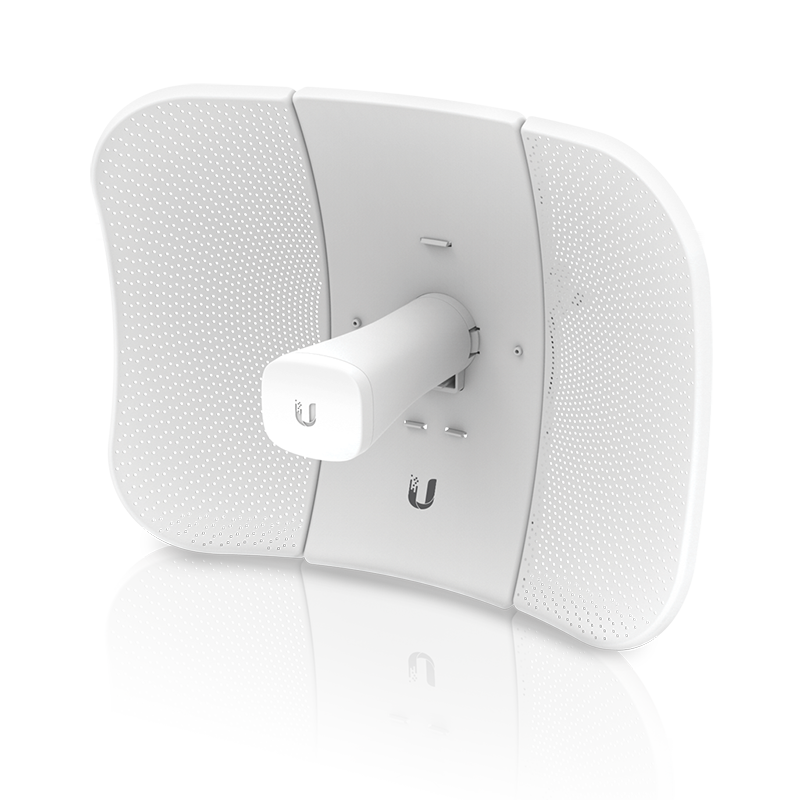
Ubiquiti LiteBeam AC
The LiteBeamAC is a very good, cheap directional router. We use it for most rooftop installs. As with all Ubiquiti gear you need to flash it with the latest firmware first. Often they ship with old beta firmware, and the latest firmware usually gets you faster speeds. Our config instructions are here.
The AC in the name is not 802.11ac, it is Ubiquiti's own protocol. These devices can only connect to other Ubiquiti "AC" devices.
Device specs are available at store.ubnt.com.
There are two versions- gen1 and gen2. By default they are on two different sets of channels which causes much confusion. The gen1 cannot use the DFS channels unless you unlock it with a code on the System tab. Once you unlock a gen1 it has the same channels as the gen2. We have the unlock code for "NYCMesh". Ask us if you need to connect a gen1 to one of our hubs or supernodes.
Gen2 comes with a more sturdy mount (though less range) and also a management 2.4Ghz radio. The new mount has no movement clockwise so the only way to get the level bubble in the middle is with a straight mount! The management radio is very handy as you don't need to know the IP of the device. The management radio is on a timer so it will go off after about 5 minutes.
LiteBeams are very directional so use the built-in alignment tool to get the strongest signal. We like to get better than -65db. Very close to the supernodes you can get -45db.
The default IP over ethernet is https://192.168.1.20/
If you connect to the management radio the IP is https://192.168.172.1/
Default login:
- name:ubnt
- pwd:ubnt
Standard config instructions are here.
How to save a LiteBeam via SSH
These instructions were adapted from a Ubiquiti Community post.
Sometimes due to a bad configuration change or issue with the connected sector, the LiteBeam signal will be too low to log into the web interface. This can be a big issue especially if the users at the node are unable to locally revert the change. Luckily, SSH can be used to reconfigure the LiteBeam to change any settings to restore proper connectivity to the node, even over a poor connection.
1. Connect and log into the LiteBeam
Using your favorite SSH software, log into the LiteBeam using the configured credentials, which will be the same as those used for the web interface. You will then be presented with a standard Linux shell.
2. Prepare for the change
Since this shell does not have any nice text editors like nano, we will use the sed command to replace text in the config file. In this example, we will be changing the SSID nycmesh-sn1-ev to nycmesh-sn1-northeast and saving the changes. Make sure that the LiteBeam will be able to connect to the new radio! (We will cover this part in the following section.)
This command confirms that the current SSID is what we expect (current SSID goes after the grep):
# cat /tmp/system.cfg | grep nycmesh-sn1-ev
wireless.1.ssid=nycmesh-sn1-ev
If the command does not return anything, that means that the current SSID does not match what you provided after grep. Run this line removing everything after the pipe | to review the config file before proceeding.
3. Edit and save the file
Now we will edit the file by finding and replacing the old SSID with this command (old and new SSIDs go before and after the middle slash / respectively):
sed -i 's/nycmesh-sn1-ev/nycmesh-sn1-northeast/' /tmp/system.cfg
Confirm that you made the change by running this command (new SSID goes after the grep):
# cat /tmp/system.cfg | grep nycmesh-sn1-northeast
wireless.1.ssid=nycmesh-sn1-northeast
Finally, run these two commands to commit the change and reboot the device:
save
reboot
Wait 2-3 minutes for the device to reboot and rescan for the new radio and you should be good to go.
How to scan for radios
If you are positive that the LiteBeam can connect to another radio's SSID, you do not need to perform a scan (known in the web interface as a Site Survey). However, it is a good idea to confirm that the signal of the other radio is strong enough to connect to before potentially losing the device.
To perform the scan, follow Step 1 from the previous section to connect to the LiteBeam. Then, run the following command to start the scan:
# iwlist ath0 scan
ath0      Scan in progress :
          Cell 01 - Address: 04:18:D6:4C:BB:07
                    ESSID:"ubnt-3P7-N"
                    Mode:Master
                    Frequency:5.165 GHz (Channel 33)
                    Quality=26/94  Signal level=-70 dBm  Noise level=-90 dBm
                    Encryption key:off
                    Bit Rates:6 Mb/s; 9 Mb/s; 12 Mb/s; 18 Mb/s; 24 Mb/s
                              36 Mb/s; 48 Mb/s; 54 Mb/s
                    Extra:bcn_int=100
                    Extra:wme_ie=dd180050f2020101810003a4000027a4000042435e0062322f00
                    Extra:ath_ie=dd0900037f01010000ff7f
                    Extra:ieee_mode=802.11n
                    Extra:center1=5165 Mhz
                    Extra:chanbw=20 Mhz
          Cell 02 - Address: E0:63:DA:D4:41:6B
                    ESSID:"nycmesh-sn1-northeast"
                    Mode:Master
                    Frequency:5.205 GHz (Channel 41)
                    Quality=41/94  Signal level=-55 dBm  Noise level=-90 dBm
                    Encryption key:on
                    Bit Rates:6 Mb/s; 9 Mb/s; 12 Mb/s; 18 Mb/s; 24 Mb/s
                              36 Mb/s; 48 Mb/s; 54 Mb/s
                    Extra:bcn_int=100
                    Extra:hostname="nycmesh-sn1-northeast"
                    IE: IEEE 802.11i/WPA2 Version 1
                        Group Cipher : CCMP
                        Pairwise Ciphers (1) : CCMP
                        Authentication Suites (1) : PSK
                    Extra:wme_ie=dd180050f2020101000003a4000027a4000042435e0062322f00
                    Extra:ath_ie=dd0900037f01010000ff7f
                    Extra:airmax_ie=enabled
                    Extra:airmax_mode=ptmp
                    Extra:ieee_mode=802.11ac
                    Extra:center1=5215 Mhz
                    Extra:chanbw=40 Mhz

...
This scan takes about a minute to complete. You may notice the terminal freeze during this time; the LiteBeam switches to another wireless mode while scanning which can sometimes disrupt the connection. As you can see in this example, our target radio with SSID nycmesh-sn1-northeast has a signal level of -55dB which should be more than adequate for us to connect.
Ubiquiti LTU
Ubiquiti has a new "technology" which is the successor to AirMax , called LTU. (more about AirMax )
We have been experimenting with LTU, as we received a gracious donation of 18 LTU-LR CPEs and wanted to put them to use. We have found that LTU generally performs well in certain applications, as detailed below.
LTU and AirMax hardware are not cross-compatible. A LTU-LR can't connect to a AirMax Sector and a LiteBeam can't connect to a LTU Sector.
Differentiating from AirMax Equipment:
The only difference between a LTU-LR and a LiteBeam-LR is the radio module. The reflector and related mounting hardware is exactly the same, except for the logo printed on the front.
You can tell a running LTU radio module apart from an AirMax one by looking at the activity light on the bottom. The LTU has a white activity light while the AirMax has a blue one.
Obviously, there is a label on the back of the radio module that tells you what it is, however this is covered when the antenna is installed.
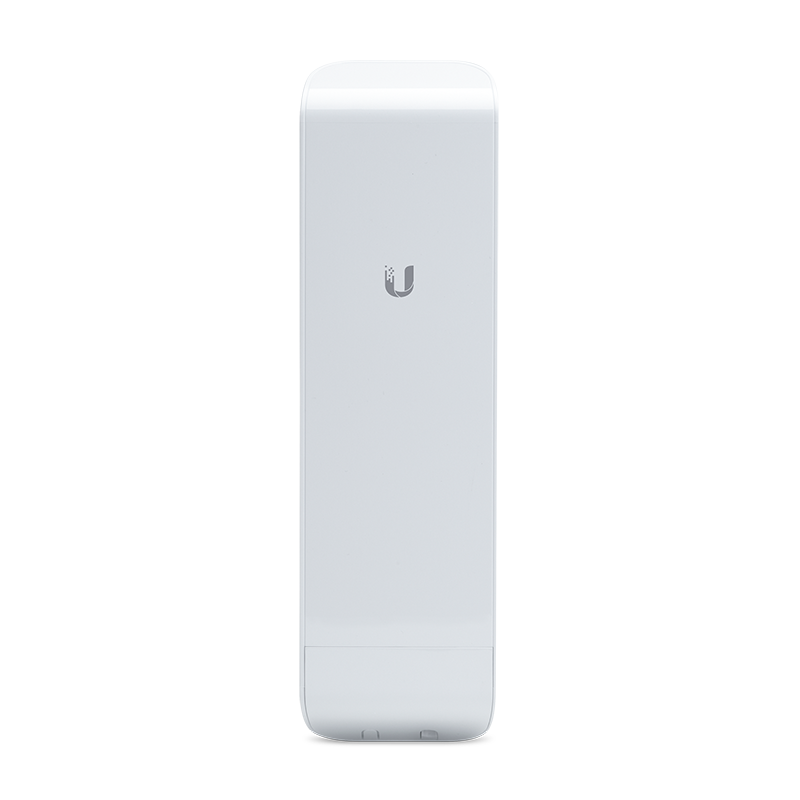
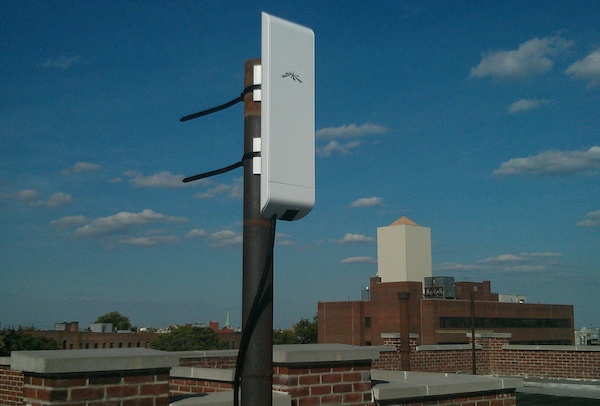
Ubiquiti Nanostation M5
The NanoStation M5 is a workhorse of mesh networks. There are two versions XM (pre 2016) and XW. It is 802.11n and 10/100 ethernet, so not the fastest on the block, but it has good support from OpenWRT. It also has two ethernet ports usually set up as WAN and LAN. Recent versions require downgrading AirOS before you flash.
For new installs we use the OmniTik router for meshing. The following page is mainly for our legacy installs.
Device details are available at ubnt.com.
NanoStation NSM5 installs
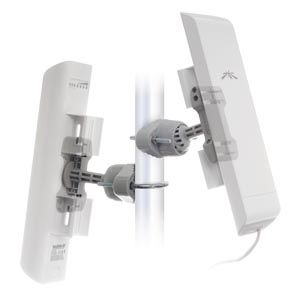
Hardware
The simplest install is to use an existing vertical pipe and the two plastic ties that are included with the router. Also a thick PVC pipe can be attached to a railing using clamps.
If you need to aim the router up or down you can use a nanobracket.
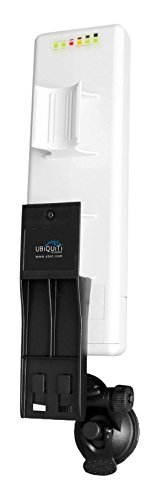
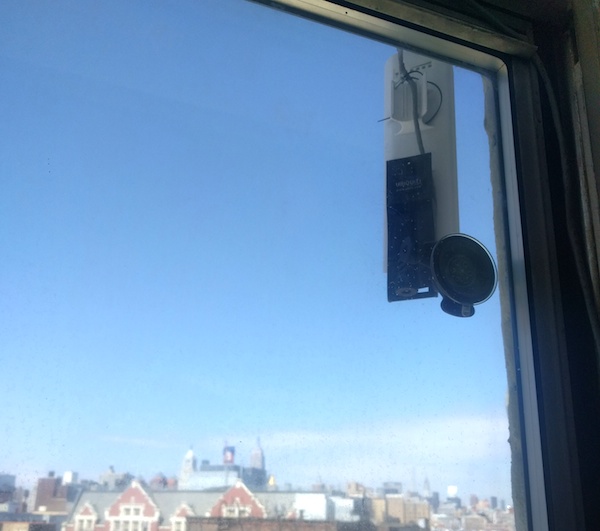
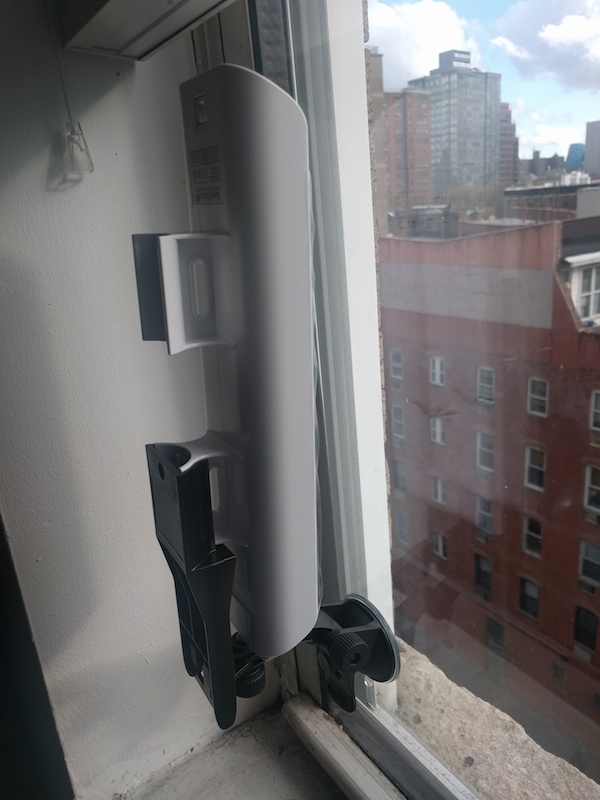
The Ubiquiti window/wall mount is a versatile mount that comes with a suction cup for windows or a screw mount for walls. The parts are reversible so the NSM5 can face either way and it also has vertical and horizontal adjustment to point in almost any direction.
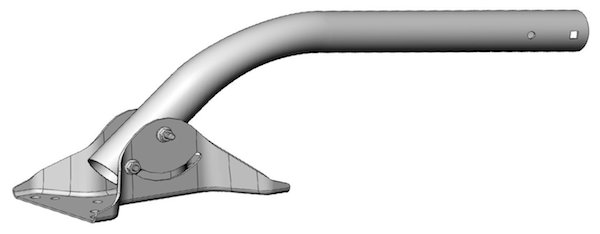
The Ubiquiti universal antenna mount can be used on rooftops or walls, where a very strong mount is needed.
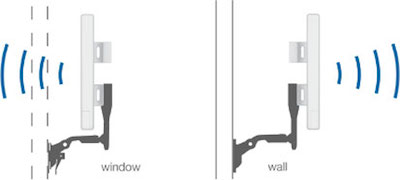
Window
Outside:
On the outside of the window it is best to use a Ubiquiti wall/window mount. The suction cup is not recommended for long-term installs.
Inside:
It is often more convenient to install inside the window. You will lose about 2db of signal but that is usually ok.
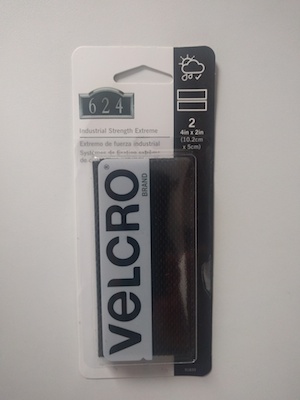
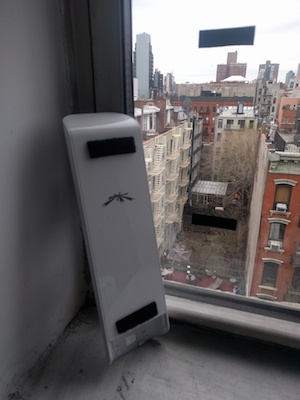
Velcro is the easiest way to install a NanoStation if it will be facing the same direction as the window. Use more velcro than in the picture (this install slipped down the window after six months!)
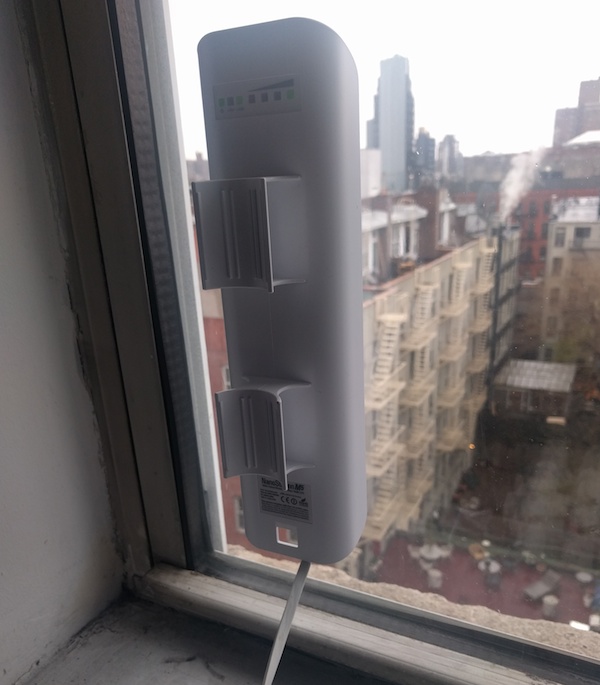
A Ubiquiti suction cup mount can be used if you need to point the router at an angle. The suction cup will fail eventually (usually on very hot or very cold days), so do not use this for long-term installs.
Rooftop
Often rooftops have an existing unused pipe or abandoned antenna pole that can be used.

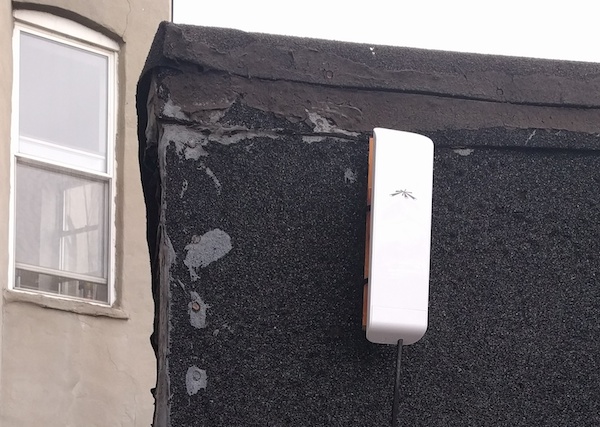
A Ubiquiti bracket is good if you have a drillable surface such as brick or cement.

Wall
A simple wall mount can be made using a small, thin piece of wood and the two plastic ties that come with the router. This will not give you much choice in direction.
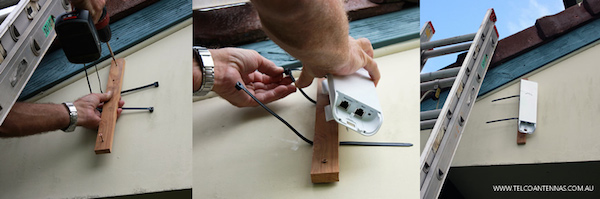
The Ubiquiti window/wall mount comes with both a suction cup for windows and a screw mount for walls. Use this screw mount on a wall so you can point the router in the best direction.

Tree
Sometimes a tree is the best place for your NanoStation.

Ethernet
Outdoor routers use "power over ethernet" (POE). A small adapter is used to add power to the ethernet. This means you only need to run one ethernet cable to the device.
The most important thing about the cable and is that it is "outdoor" cable. Otherwise the plastic will decay in the weather. We use Cat 5e. A cable run must be less than 100m (300 feet), or the signal and voltage drop will be too much.
There are two ethernet ports on the NanoStation and these are a source of confusion. Like most outdoor routers they get their power over the ethernet cable. They come with an adapter that adds 24V of power to the cable. Be careful plugging live cables into ports that are not expecting a voltage.
Here are two ways to wire your NSM5:
Setup 1 (client)
You are connecting to a remote gateway that is providing your internet. You plug the ethernet cable into the "main" (LAN) port of the NSM5. The cable goes to the power adapter POE. "LAN" on the POE adapter goes to the WAN of an indoor router.
(Sometimes people are close enough to the NSM5 that they don't bother with the indoor router.)
Setup 2 (gateway)
You are sharing your existing internet with your neighbors. You plug the ethernet into the "secondary" (WAN) port of the NSM5. The cable goes to the power adapter POE. "LAN" on the POE adapter goes to the LAN of your existing indoor router.
Powering two from one adapter
If you need to install two NanoStations you can simply run a cable from the spare ethernet port to the other NSM5. If the POE is plugged into the secondary port (gateway setup) then the "main" will act as passthrough to the second NSM5.
To turn on passthrough from main to secondary you need to do this (source)-
# older nanostation XM (pre-2015)
echo 8 > /sys/class/gpio/export
echo out > /sys/class/gpio/gpio8/direction
echo 1 > /sys/class/gpio/gpio8/value
# disable with echo 0 > /sys/class/gpio/gpio8/value
# nanostation XW (2015-)
echo 2 > /sys/class/gpio/export
echo out > /sys/class/gpio/gpio2/direction
echo 1 > /sys/class/gpio/gpio2/value
# disable with echo 0 > /sys/class/gpio/gpio2/value
I've found this setting doesn't stick after reboot, so you need to add it to /etc/rc.local (local startup)-
http://admin.qmp/cgi-bin/luci/admin/system/startup
LAN vs WAN confusion
On the NSM5 the "main" port is LAN and the secondary is "WAN". This is the most confusing thing about the router and mixing this up is the cause of most problems. Always connect WAN on one router to LAN on another!
If you connect LAN to LAN it will be unstable as each LAN port usually has a DHCP server and both ports will be trying to assign an IP address to the other. Also don't connect WAN to WAN as this makes no sense. This is by far the biggest problem with people setting up routers and it is so simple to avoid.
Configuration Videos
- If you're trying to use this device to broadcast wifi from your existing home internet connection, follow the instructions in this video: https://www.youtube.com/watch?v=r1ruM6skrus
Ubiquiti Unifi-Ap
We are using more UNIFI access points on installs these days. These devices are very frustrating to set up, so this document is designed to help.
As of 2021 the latest firmware 4.3.28 has very short uptime (<30 days), so we are using a stable older version 4.3.20 (copy this link)
Never use 4.3.28 or later, as the device will go down and require a site visit to reboot!
The devices are coming with very old firmware that isn't even compatible with the controller so step one is to SSH into the AP and upgrade it to 4.3.20.
Adopting wirelessly doesn't work, so we adopt the AP to the controller wired before installing!
After moving on site, you may need to ssh in and set-inform to tell it the address of the controller
SSH firmware instructions
Here's Ubiquiti's instructions
We usually download the 4.3.20 update and choose the "Updating without internet..." option using scp.
Meshing
We mostly install these devices with one wired connection for every two or three unwired ("meshed"). It's best to avoid more than one wireless hop.
Wireless meshing basically doesn't work after version 4.3.20. Apart from later versions being unstable, when one goes down it can take down all the other meshed devices! We're in a very long conversation with Ubiquiti about this.
UAP-AC-M (rabbit ears)
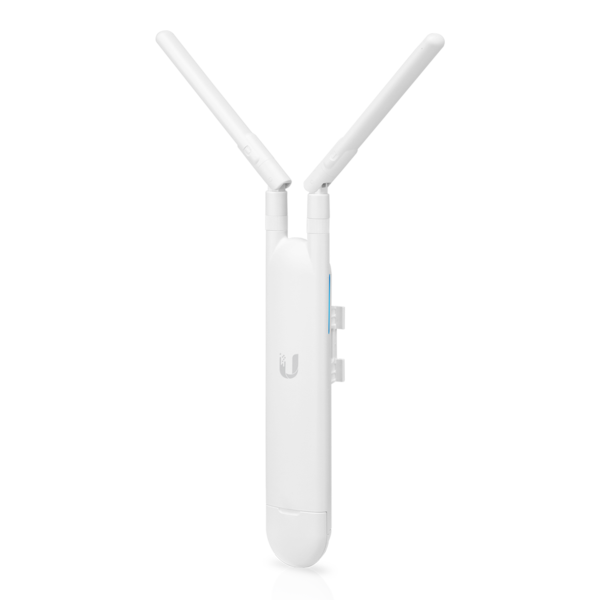
- Price $100 (also comes in 3 packs and 5 packs)
We've installed these at Clemente and they have proved to be reliable when running 4.3.20
UAP-AC-M-PRO
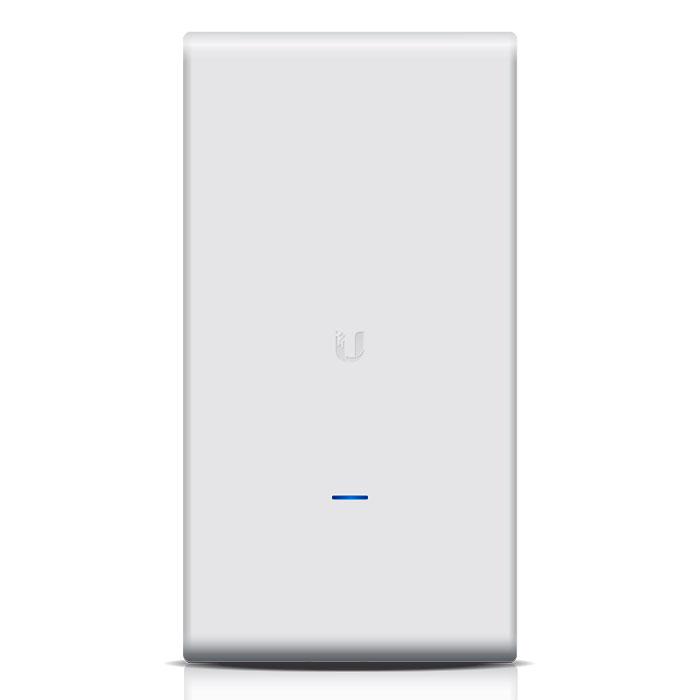
- Price $200 (also comes in 5 pack)
We've installed these at Grand St and Vernon
They are designed to mount on a wall. We've been mounting them on light poles which means creating your own mount (a lot of work!)
They seem ok and we haven't had any completely fail yet. The case is just snapped together. I had one randomly come apart before installing.