Crimping
Here are some helpful videos on crimping. Like nearly everyone we use the T-568B standard
Video 1
Video 2
Seattle Community Network Crimping Guide:
This guide was originally published on Seattle Community Networks Website.
https://docs.seattlecommunitynetwork.org/learn/cable-crimping/
Credit to them for writing such a great guide and letting us use it as well!
Step 0) Slip on the RJ45 boot (optional)

Step 1) Strip the cable
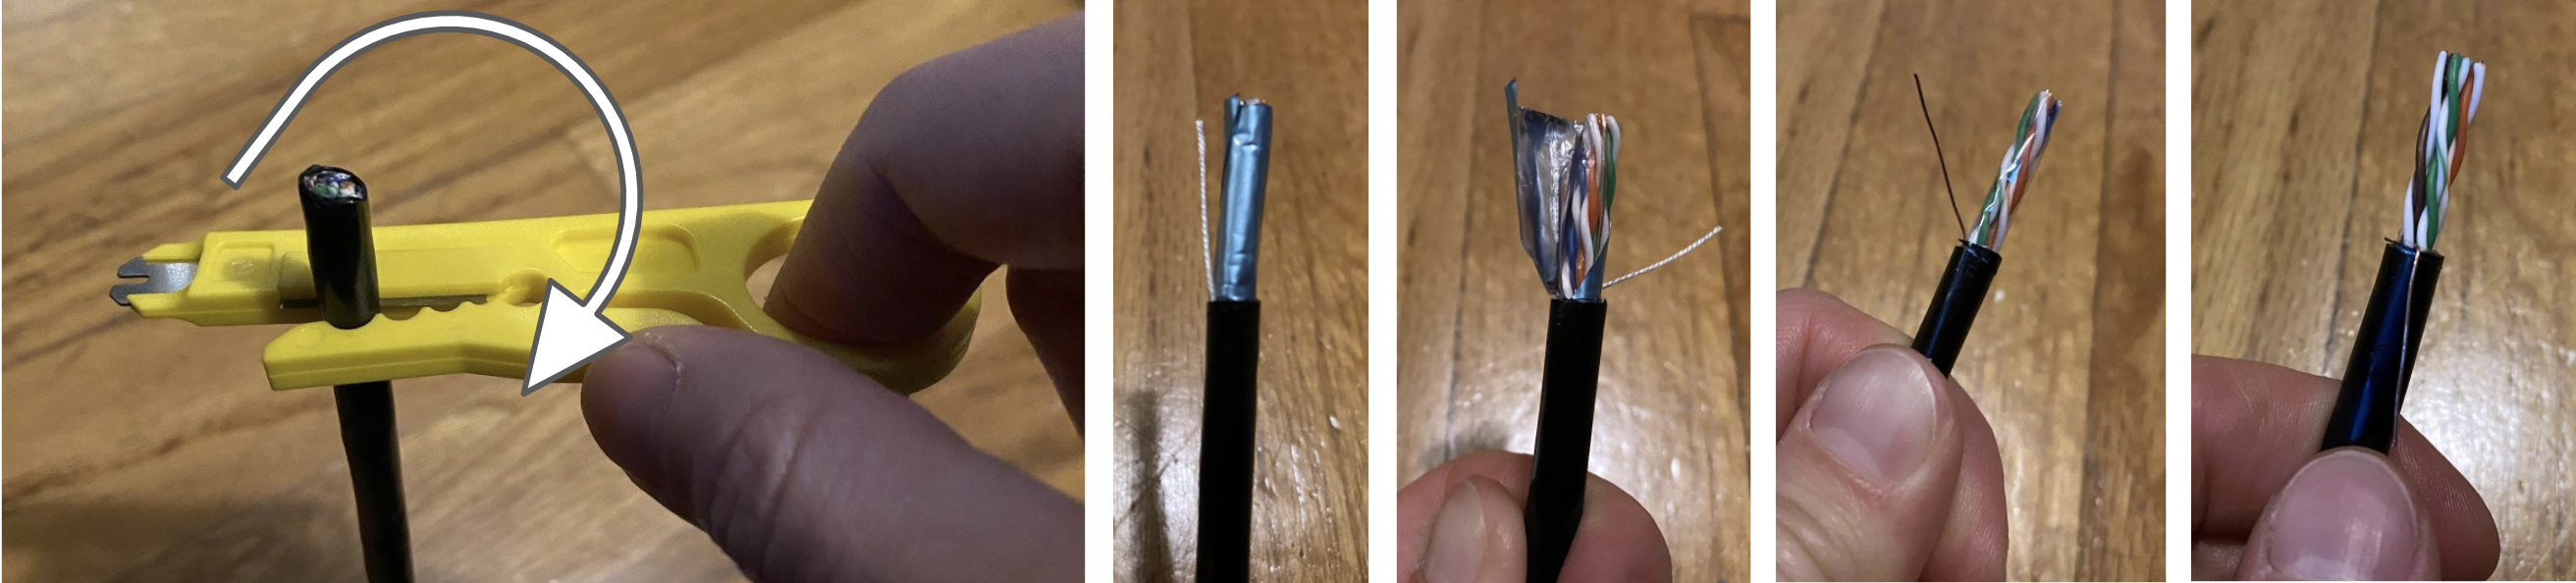
- Push the cable into the razor slot of the strip tool and turn it around the cable to make an even cut around the sheath. Careful not to nick the wires inside!
- Unwrap the blue foil shielding and plastic to uncover the twisted wire pairs.
- Push the copper grounding wire to the side. (Ignore the white string.)
Step 2) Organize the wires
In this step, you'll be taking the 8 colored wires inside the ethernet cable and putting them into the correct ordering of colors.
NOTE This is the hardest part of crimping! The wires are small and are hard to control. Take your time and make sure you do this step correctly! Otherwise you might have to go back and restart.
Step 2.1) Untwist the wires
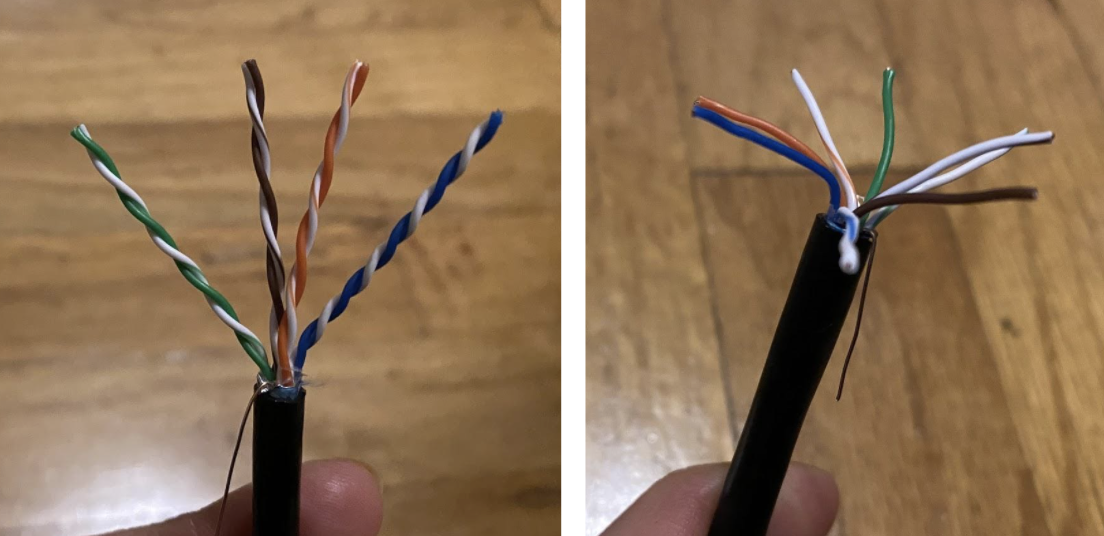
There should be 4 pairs of wires: green, brown, orange, and blue. Each pair has a solid-colored wire and a striped-colored wire. Untwist these pairs and separate them into the 8 wires.
Step 2.2) Straighten out wires
After untwisting the wires, they are probably still kinked and look like they want to be twisted. In this step, you should carefully grab all the wires and try to straighten them out by pulling on them. This will prevent the wires from moving around later on.
WARNING Don't break off the wires!
Step 2.3) Lay out wires in order
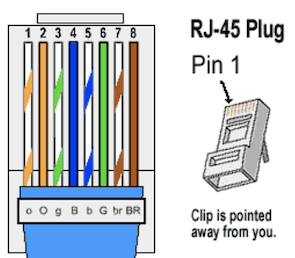
With your straightened out wires, put them into the correct order! Make sure that the wires are all flat and in line with each other.
The ordering for these wires is: 1. Striped orange 2. Solid orange 3. Striped green 4. Solid blue 5. Striped blue 6. Solid green 7. Striped brown 8. Solid brown
TIP After laying them out in order, straighten them out again as a group! This will help keep the wires together.
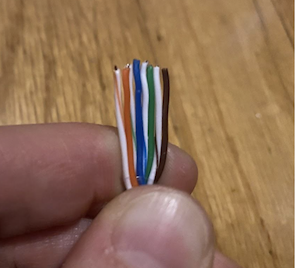
Step 2.4) Trim the wires
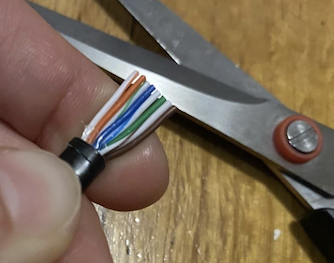
Trim the wires evenly to about 1/2 inch in length using scissors or the blade of your crimping tool. You want to make sure you have enough room for the wires to reach the end of the RJ45 connector. But also try to have room for the jacket of the cable to be inserted into the connector too.
TIP You can put the wires side-by-side to the RJ45 connector to see how long you should cut it. Look at the next step to see what the final product looks like.
TIP If you don't have the shielding inside of the connector, it makes it easier for the wires to snap off later, which is bad.
TIP Make sure that you cut the wires evenly!
Step 3) Slide wires into RJ45 connector
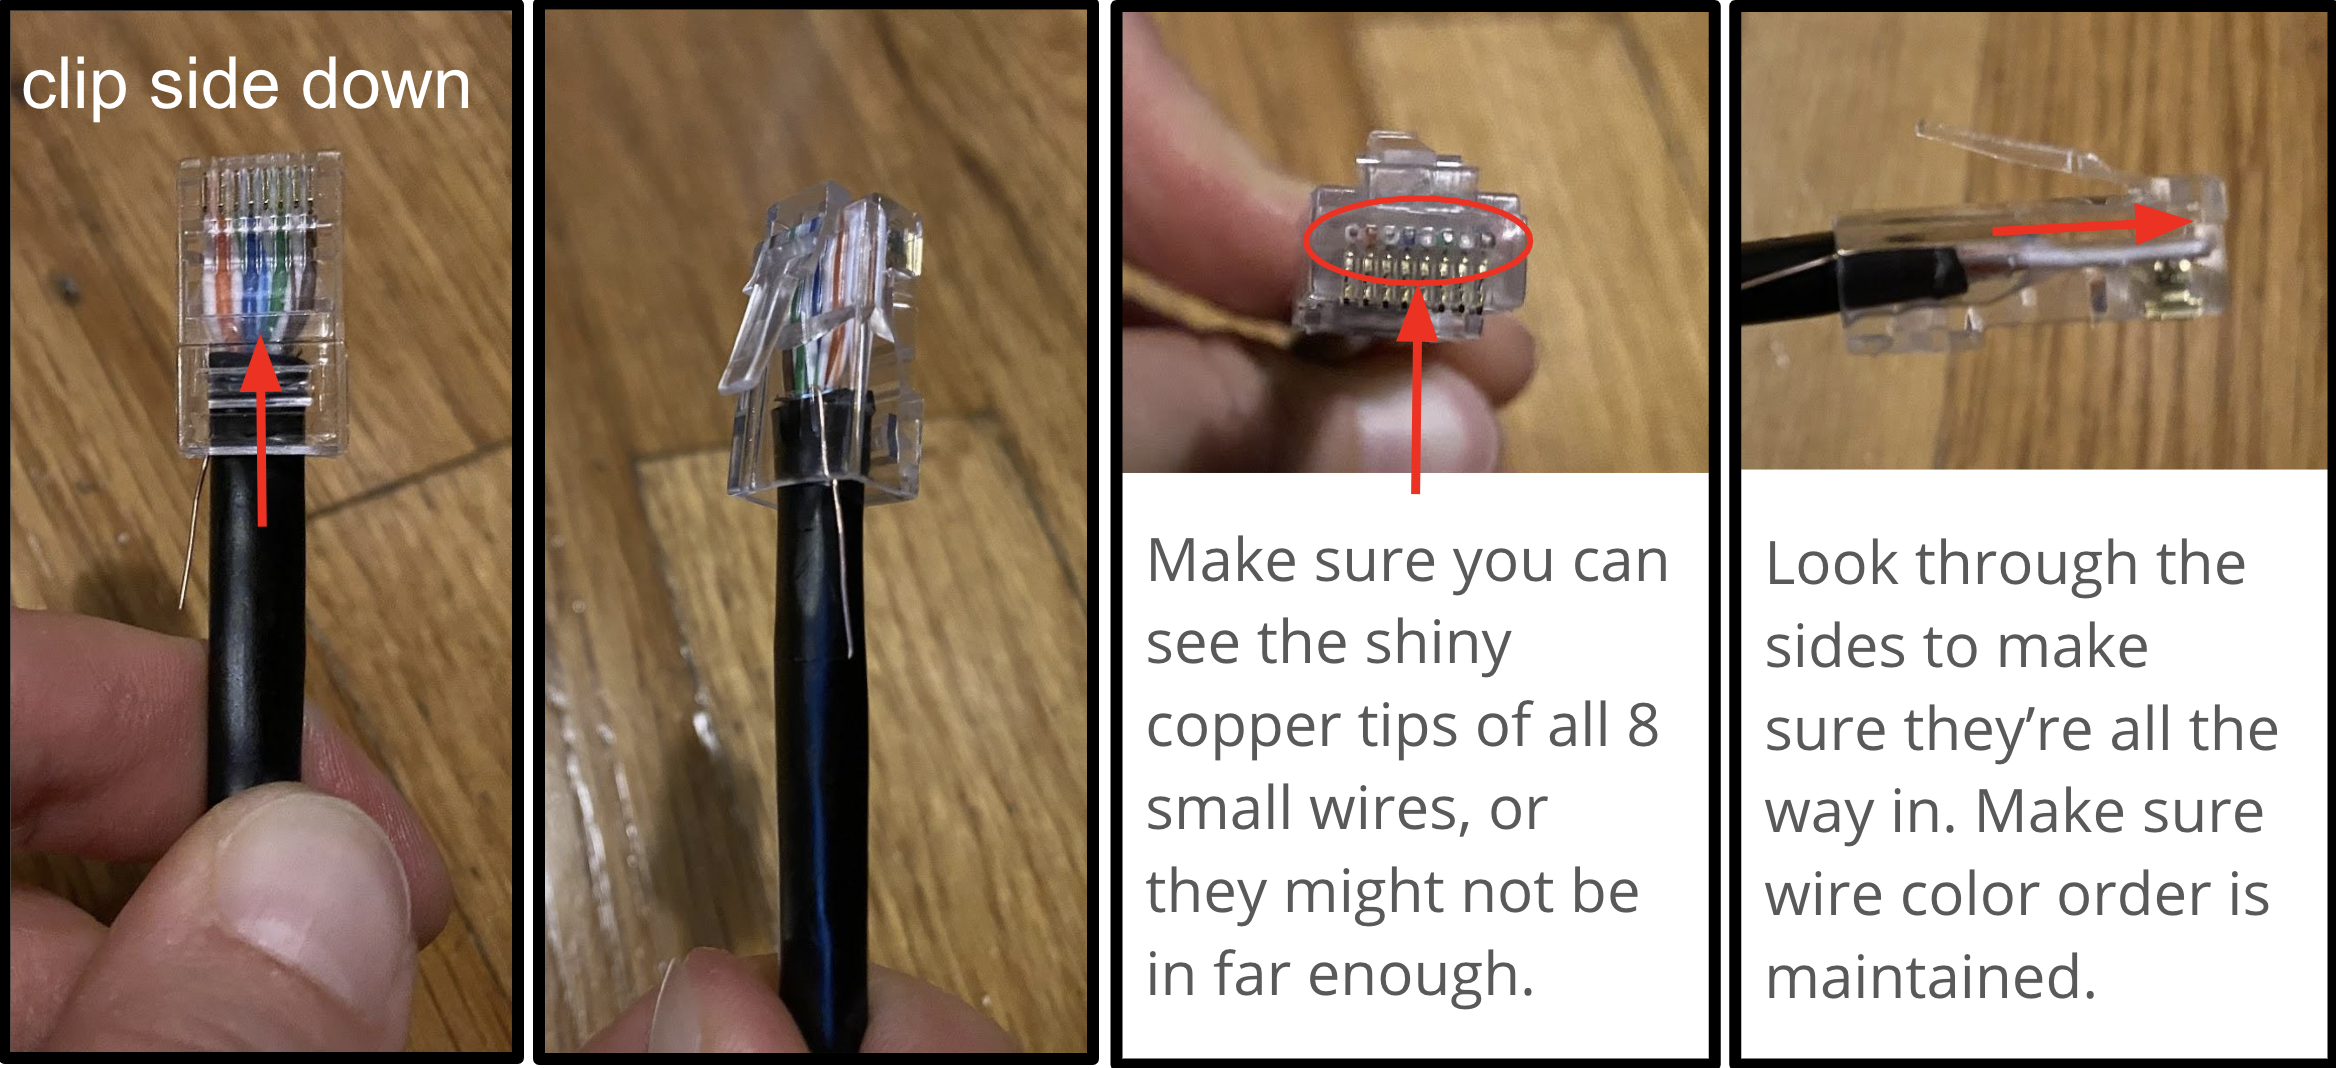
Carefully slide your 8 wires into the connector. Make sure that the clip is facing away from you! If it is really hard to slide it into the connector, you probably didn't straighten out the wires enough in step 2.2 or 2.3.
Step 4) Crimp it
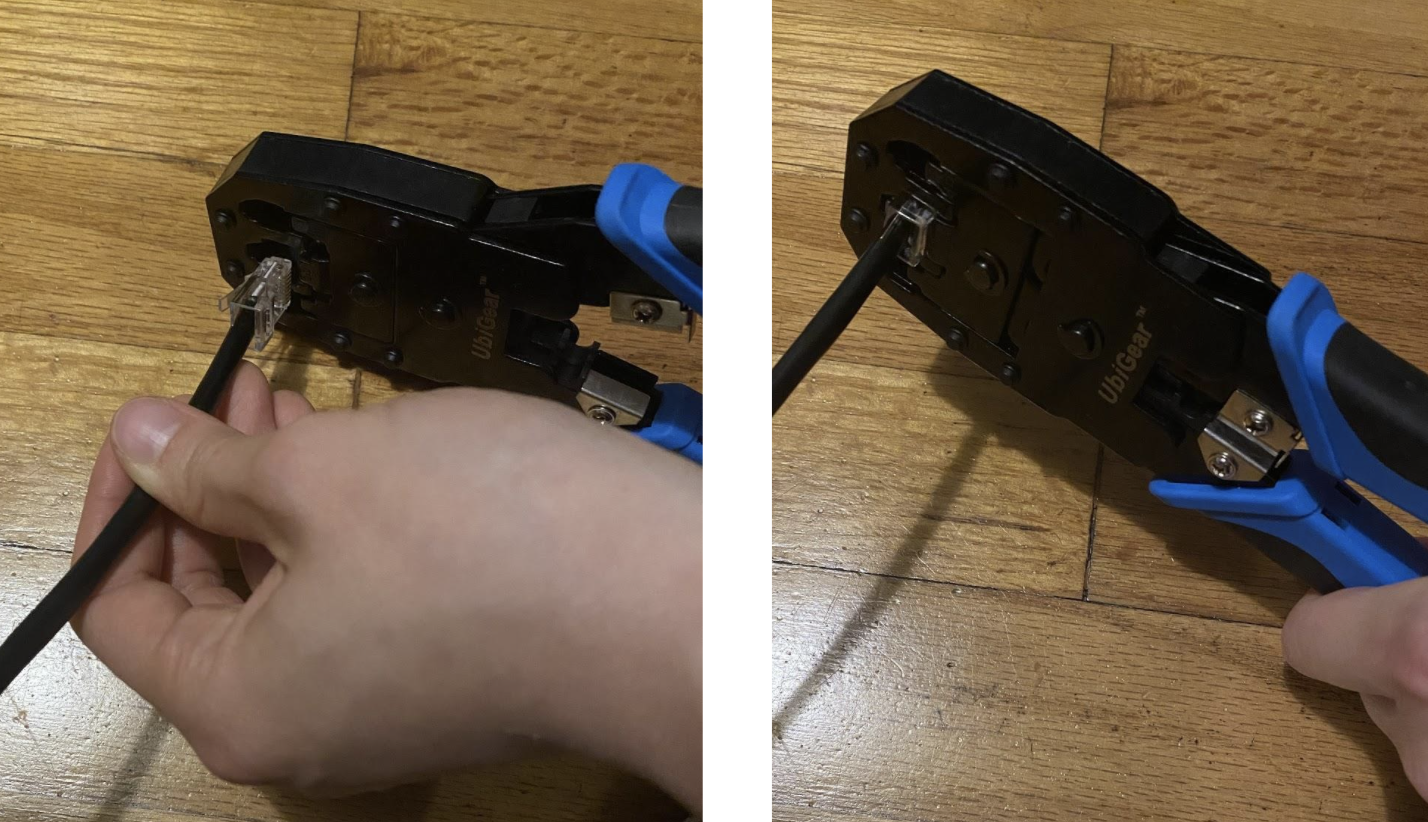
Push the RJ45 connector into the slot of your crimping tool for RJ45 connectors. The slot should be labeled something like "8P" for the 8-pin RJ45 connector that you're using.
In this step, you're doing the actual 'crimping' part and crimping/compressing/stabbing the 8 golden pins on the RJ45 connector into the 8 colored wires.
TIP Squeeze as hard as you can! You need to make sure that all 8 pins are crimped.
Step 5) Test it
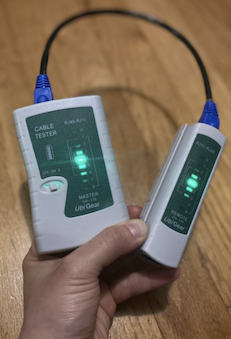
Slide the two pieces of the tester apart and plug each of the cable ends into either piece. Turn the switch to “On” or “Slow.” If it's working, all 8 numbers should be flashing green.
If any of them are not showing green, it means something is wrong and you have to redo it! The RJ45 connector can't be reused once it's crimped, so you should just cut the end off and start back at step 1.
If everything is green, then you're done! If you had a cable boot, you can push the boots onto the RJ45 connector now.