How to use an EoIP tunnel to send your device's traffic to another part of the mesh
In some situations, such as when troubleshooting traffic paths, or trying to bypass a LinkNYC captive portal, it is useful to send "interactive" traffic from a personal device such as a laptop or phone. This is also useful when trying to asses a qualitative sense of how a connection "feels" rather than just looking at the numbers that can be created by diagnostic tools.
In order to change the route that traffic from one place takes to another on the mesh, the usual approach is to modify OSPF link costs. This should be tried first. The instructions here are only for temporary debugging when OSPF cost changes are not desirable (usually because they would cause undesirable secondary impacts to devices other than the one you are using).
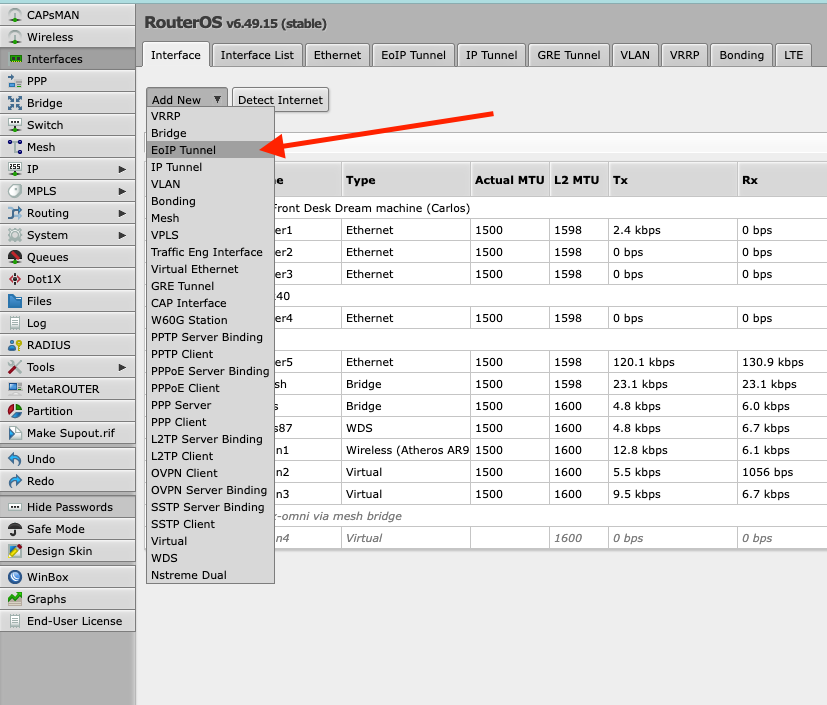
In order to send your traffic to another part of the mesh, locate the closest upstream mikrotik router. This can be a Mikrotik LAN or VPN router if you have one (as long as it has a 10.x mesh IP on at least one interface) but is probably the rooftop Omni for most folks. On this device, add a new interface for the EoIP tunnel:
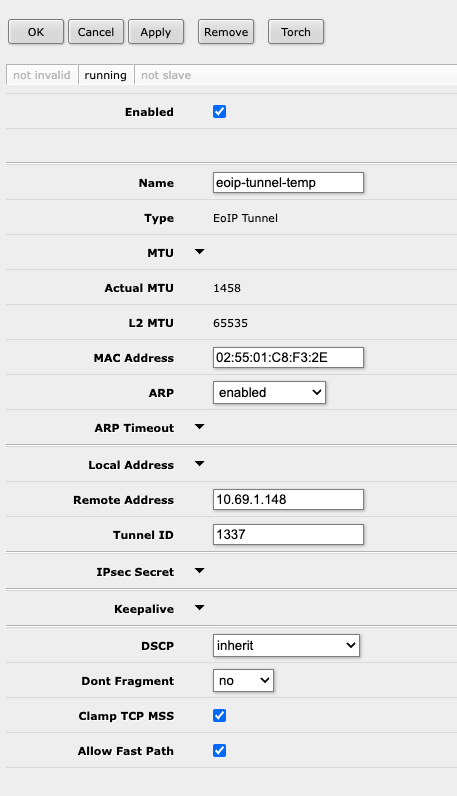
Give the tunnel a name, and enter the IP address of the other Mikrotik router that you want to tunnel your traffic to under "Remote Address". Give the Tunnel a unique ID so that it doesn't interfere with any other tunnels that may be present on the two routers
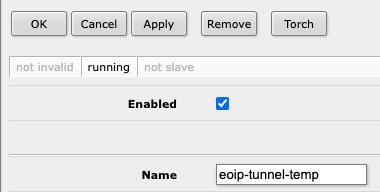
Go to the router on the other side and follow the same steps, using the IP address of your first-hop router (on the interface that connects to the mesh if appropriate). Make sure both tunnels are set to enabled and confirm the link appears up in both places:
If the tunnel doesn't say "Running" on both sides, double check that the firewall rules permit connections using the "gre" protocol, and that the routers can reach each other at the configured addresses
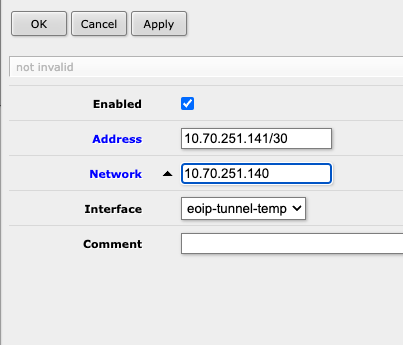
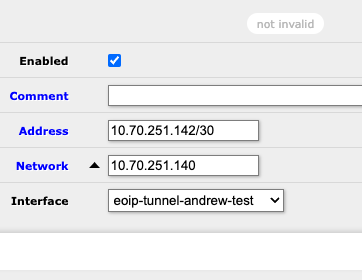
Next, establish IP communication over the new interfaces. Assign a static /30 (a /31 will not work!) in the IPRanges spreadsheet for this tunnel, and then use the pair of addresses for the interfaces on each side of the tunnel (IP -> Addresses -> Add New):
Confirm that the addresses are reachable over the appropriate interfaces by using a traceroute from both sides. Note: it is important that these traceroutes show only a single hop, if there are multiple hops then the traffic is going unencapsulated outside of the tunnel
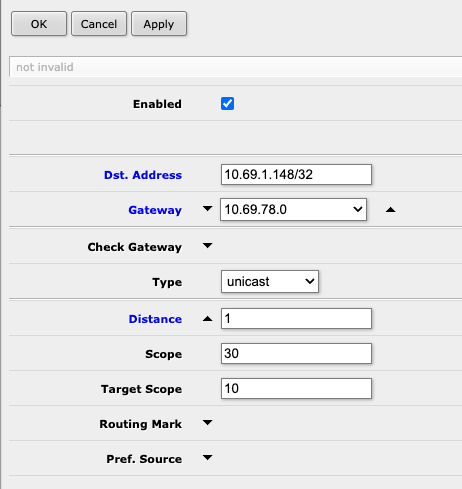
Next, on your first-hop router, create a /32 static route to the destination router with a cost of 1, via the typical gateway (likely your adjacent upstream hub or node). This is needed so that when we introduce a low cost default route in the next step, the tunnel doesn't ouroboros itself.
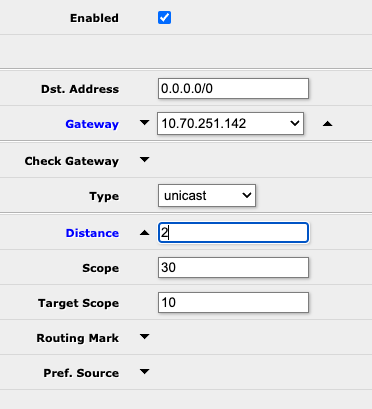
On your first hop router, create another static route, this time for 0.0.0.0/0, and specify the IP address of the router on the other side of the tunnel as the gateway, with a cost of 2:
Perform a traceroute from your first hop router (or your personal device) to confirm the tunnel is working as expected. The traceroute should look different from normal, and should include the tunnel address we allocated for the other router as the first hop:
If you are trying to troubleshoot standard internet exits from the target router, you are now finished. You should be able to use any downstream devices on the router you have modified and the traffic will be routed through the target device. However, if you are trying to troubleshoot/bypass a LinkNYC captive portal, one more step is required
NAT Configuration for LinkNYC Captive Portals
If you successfully followed the directions above using the kiosk SXT as the remote router, you should have your local traffic passing through that SXT. However as show in the traceroute, it will likely be arriving at that SXT and then immediately turning around and going out via the standard neighborhood exit.
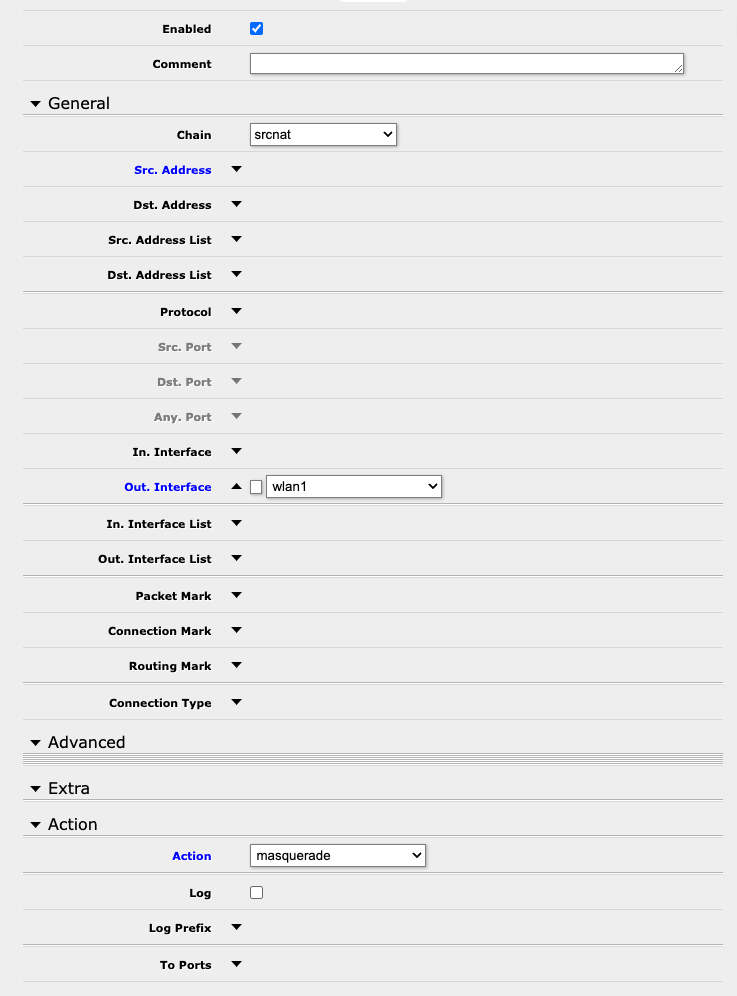
In order to send your traffic to the LinkNYC kiosk for troubleshooting, you will need first need to add a NAT rule to the SXT to map your traffic to the IP address on the wlan1 interface that it gets from the Kiosk via DHCP. On the kiosk SXT, under IP -> Firewall -> NAT, create a rule with the following configuration to NAT any traffic going out wlan1 to the DHCP address of the SXT:
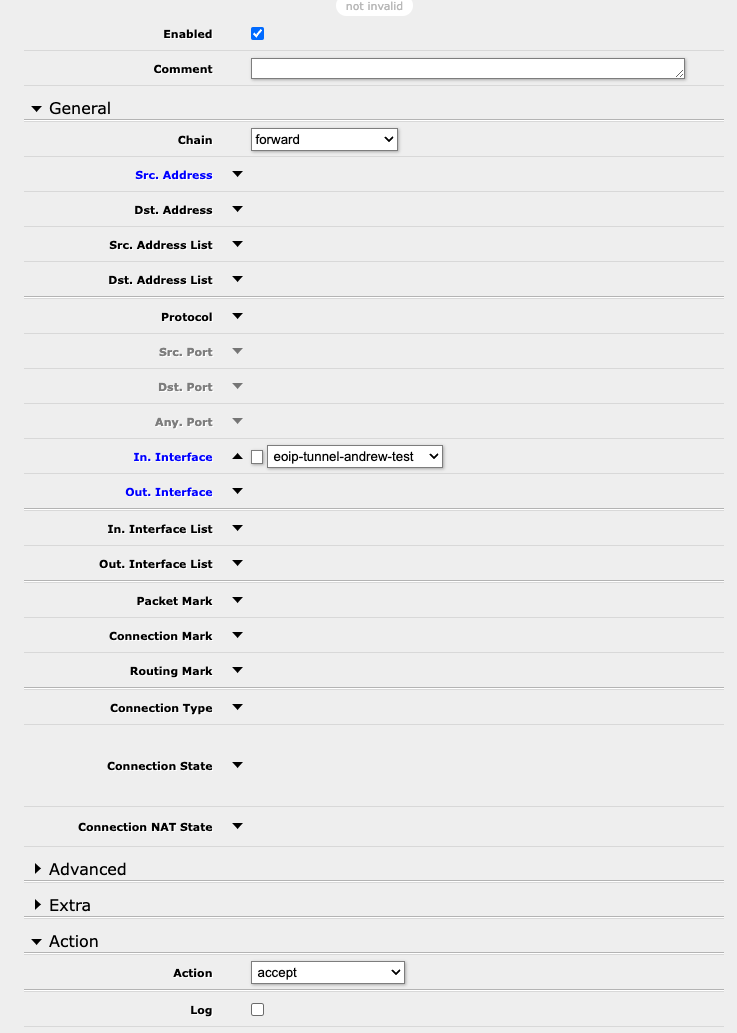
You will also need to add a firewall rule to allow this forwarding to occur. Under IP -> Firewall -> Filters, add a new rule to permit traffic to be forwarded when it originates from the tunnel we created:
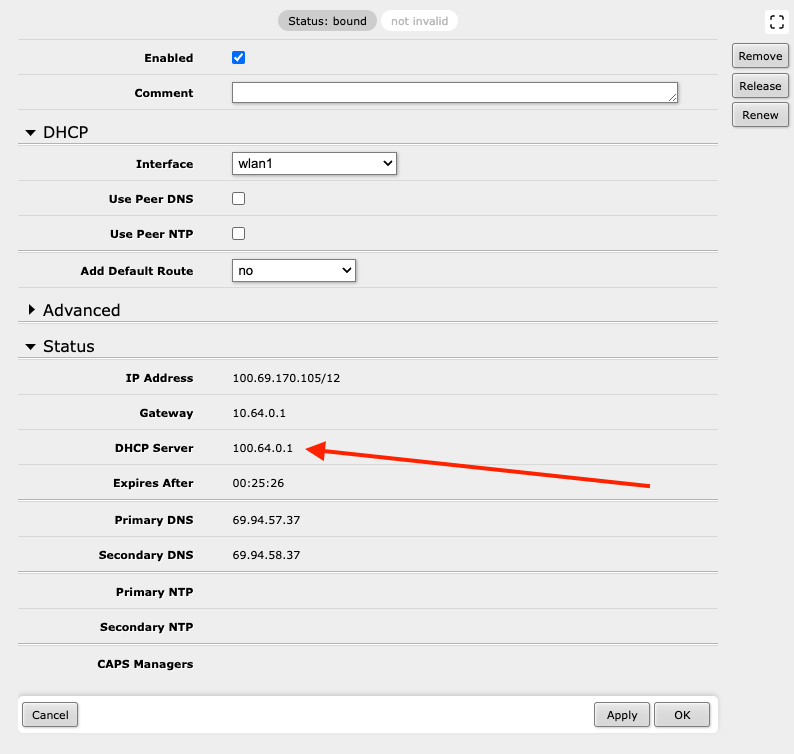
We need to determine the IP address we should use for the gateway. To do this, check the status under IP -> DHCP Client -> wlan1 check for the address listed under DHCP Server (it's unclear why Gateway is not the correct address to use here)
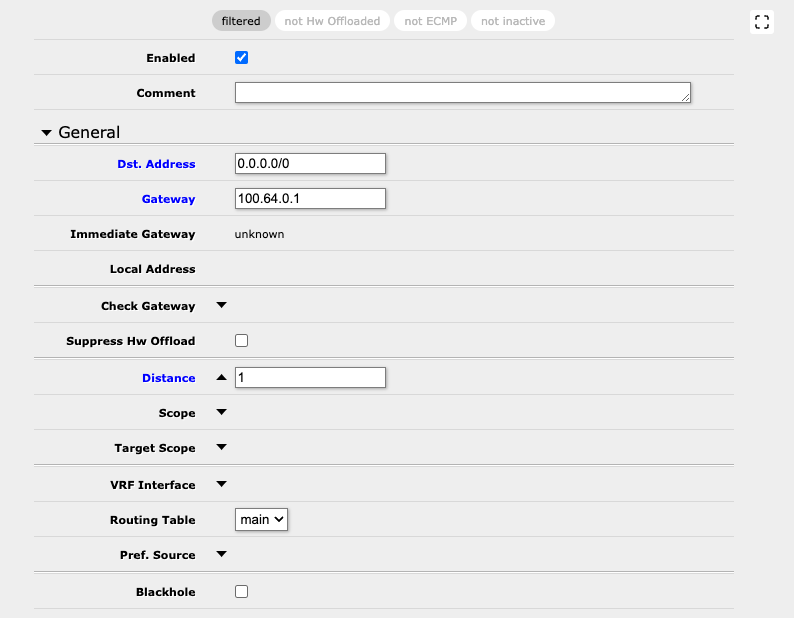
Finally, add a static route (IP -> Routes -> Add New) to 0.0.0.0/0, and specify the IP address we found above, with a cost of 1:
You should now be sending your traffic via the kiosk. To confirm you can try to perform a traceroute (but beware that the LinkNYC network drops all ICMP traffic, making troubleshooting difficult). You can also check your public IP address with a website such as whatismyipaddress.com
Cleanup
After you are done bypassing the captive portal or finished troubleshooting, be sure to disable or delete the configuration we created above:
First-Hop Router
- Static Default Route
- Static Route to Remote Router
- IP Address on Tunnel Interface
- EoIP Tunnel
- Firewall changes (if applicable)
Target Router
- IP Address on Tunnel Interface
- EoIP Tunnel
- Static Default Route (if you followed the LinkNYC Kiosk Instructions)
- Firewall rule (if you followed the LinkNYC Kiosk Instructions)
- NAT Rule (if you followed the LinkNYC Kiosk Instructions)

