TP-Link Indoor Router
Some Archer A6/7 models have a function that disables the WiFi if the WPS button on the back of the router is held down. If you encounter a router that doesn't appear to have WiFi working, try holding the button to re-enable it. Also make sure the button isn't stuck or otherwise damaged.
An indoor router, connected by ethernet cable to the outdoor router, is required for an NYC Mesh member to connect their personal devices to the Internet. For volunteer-led installations, the install team will supply the new member with a TP-Link Archer A6 or a TP-Link Archer A7.

Pre-Configuration Best Practices
For volunteer installers
Before configuring, ask the user member to tell you:
- Whether they would like to use the TP-Link router we supply or their own
routerrouter. ATheusername andmanagement password for therouterrouter.- An SSID and password for the home wireless
networknetwork.
TP-Link Archer A6 or A7 Router Configuration Instructions
For volunteer installers and DIY installers

-
Plug the ethernet cable from the outdoor antenna/router into the TP-Link’s blue WAN port.
-
Plug the power adapter into the wall and the cable into the power socket of the router. The router will turn on automatically.
-
Connect the installation laptop to the router by plugging an Ethernet patch cable into the yellow LAN port or via Wifi (see the underside of the router for SSID and pwd)
-
Navigate to the router dashboard in an Internet browser. The Default IP address is 192.168.0.1
Username:Theadminfirst(ortimewhateveryouit saysturn on theundersiderouterofit will ask you to get a management password. This is used to log into therouter)management / settings page and is different than the WiFi password that you'll use to connect to the WiFi.Password:Writeadmindown(orthiswhatever is sayspassword on theundersiderouterofsticker or give it to therouter)member to hold on to.
-
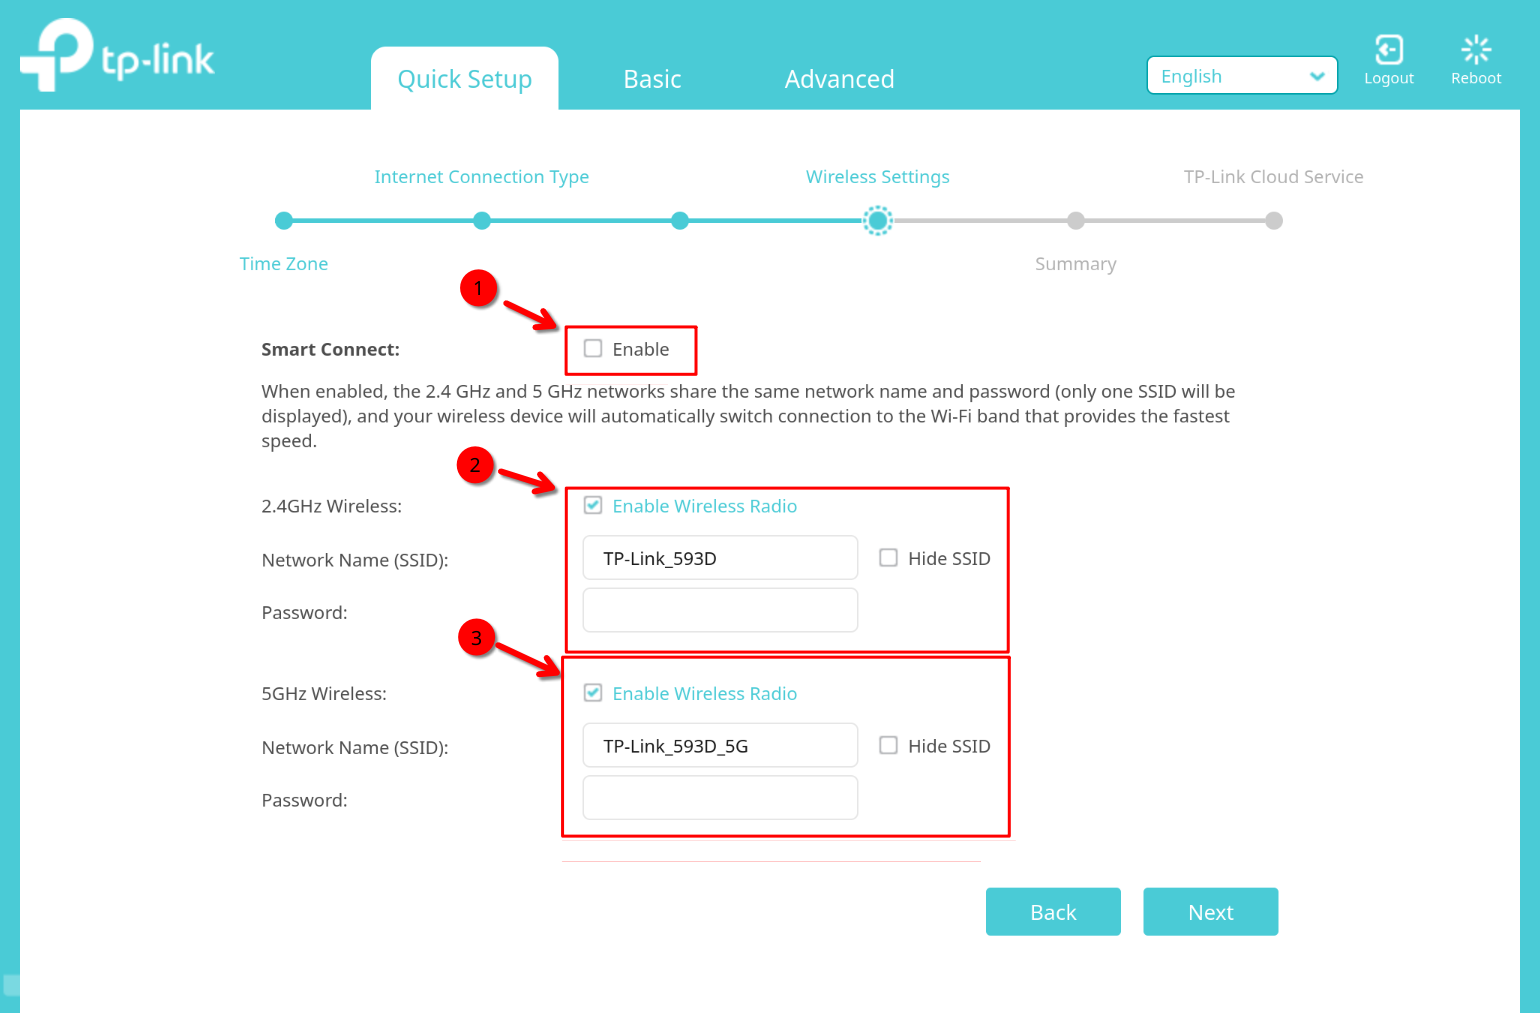
SetOnceupyou log in, you will automatically drop in into theguestbasic setup utility:- Set the Time Zone
(GMT-05:00) Eastern Time (US Canada) - Set the Internet Connection Type to "Dynamic IP"
- Choose "Do not clone MAC address" for the next page.
- On the next page, you will setup the WiFi
toname“-NYCandMeshpassword.guest-”- Turn off Smart Connect (
includingthis either combines or separates thedashes).2.4Navigateandto5Ghz“Guestnetworks.) - Mark sure 2.4Ghz is enabled and set
asthefollows:SSID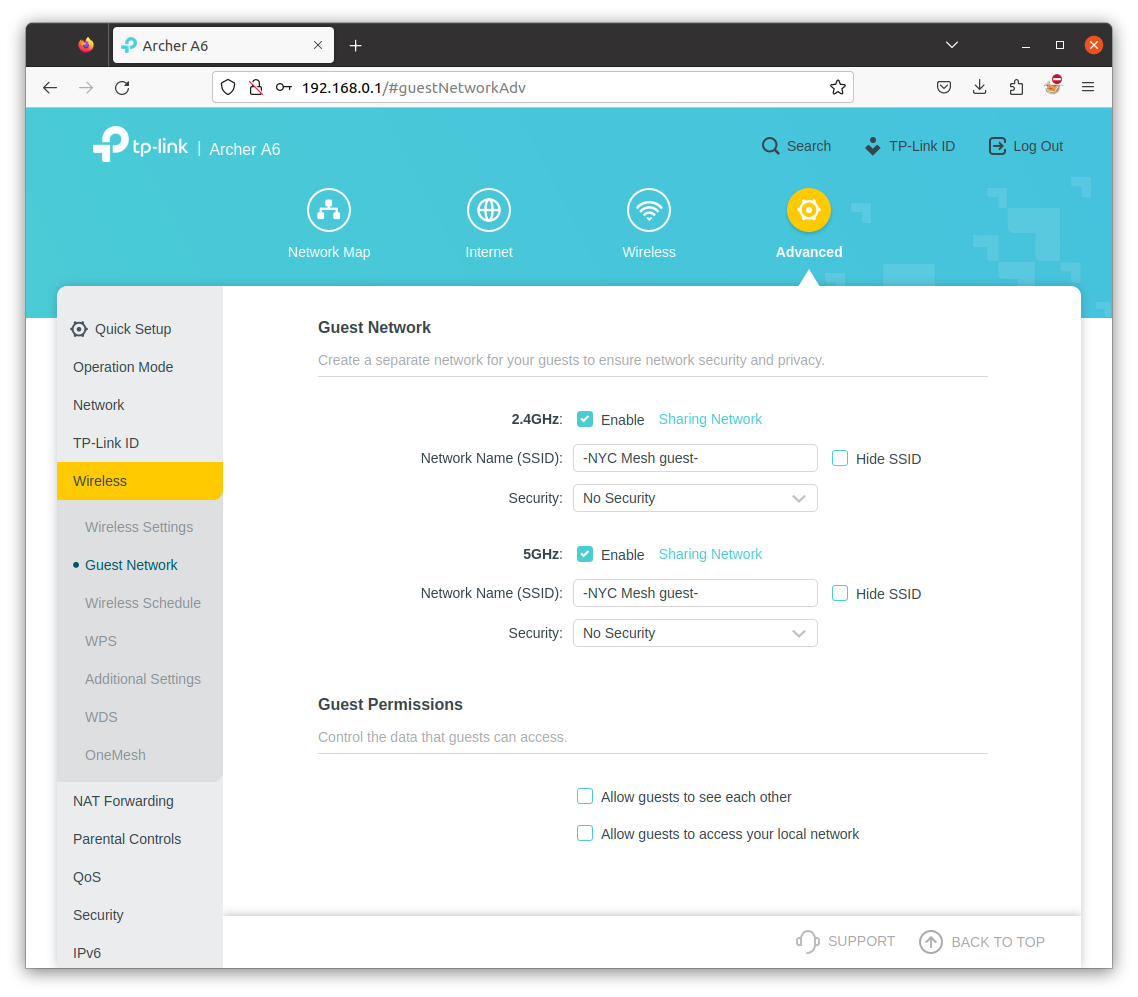
- Make
Setsureup5GhztheishomeenableWiFi. Navigate to Wireless > Basic Settings toand set thehome WiFi networkSSIDyou wish to use and navigate to Wireless > Wireless Security to set the password. Replace the router’s admin/admin login with a more secure usernameand password.Navigate to System Tools > Password and input a new username and password.
Please readObligations
Network” - Turn off Smart Connect (
- The next page will give you a confirmation of the settings. Make sure everything is correct and click Next.
- The final page has a sign up for TP-Link's cloud remote management. You can ignore this.
It also has handy QR codes to join the WiFi network you just set up. Scan them with your phone camera to connect.
- Set the Time Zone

Once you save the settings you'll be able to connect devices to the network. If you need to change the WiFi settings later, navigate to 192.168.0.1, log in and click on either basic or advanced settings, then Wireless.
Firmware Upgrade
For volunteer installers
If you have time you should pre-configure the router as much as possible, including upgrading the firmware to the latest version. To do that the router does not need to be connected to a network. It can be pre-configured following the above steps excluding point 1.
- Download the latest firmware file here for the A6or here for the A7.
- Connect to 192.168.0.1 and log in with the username and password you set for the router.
- Go to System Tools > Firmware Upgrade.
- Click Choose File to locate the downloaded firmware file, and click Upgrade.
- Setting the time is not a necessity but nice to do. Go to System Tools > Time Settings. You can use the IP address:
10.10.10.123(best) and/ortime.cloudflare.comtime.google.comtime.apple.com
Support
For volunteer installers and DIY installers
A Quick Installation Guide and User Guide can be downloaded here for the Archer A6 and here for the Archer A7.