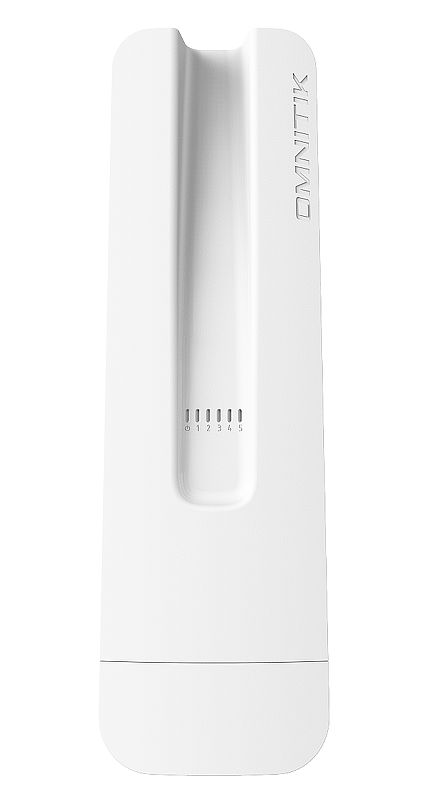
MikroTik OmniTik 5 POE AC
The Omnitik 5ac is an outdoor switch/router with a built-in 5Ghz 802.11ac access point, omnidirectional antenna, and 5 gigabit ethernet ports. Be sure to get the POE version. Here are the config instructions
The OmniTik serves as a central rooftop hub with several purposes:
- As a switch to connect multiple apartments or other rooftop devices (LiteBeam, SXTs etc.)
- Can output POE power to power LiteBeams or other antennas.
- It acts as an WiFi Access Point for the rooftop, and runs our config of WDS and OSPF so it will mesh with other OmniTiks or SXTsqs within a few blocks
- Provides remote management, a console interface and allows speed/traceroute/ping testing of the hub.
Please be sure to see MikroTik Specifics for extra info about Mikrotik devices, how to connect, etc.

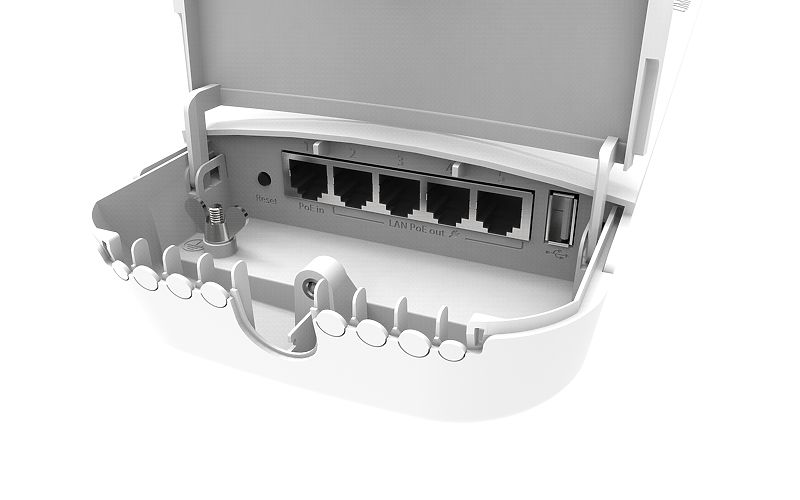
The PoE version accepts 12-57V passive PoE on port 1 and can be configured to provide PoE out to ports 2-5.

The small round plastic tabs, shown in the picture above, should be removed for those cable ports you will use - push them firmly inwards to remove. Leave the tabs in unused ports to prevent water entry.
Device specs are available at Mikrotik.com
Uses
- Hub node routing or AP ( for standard 802.11ac hubs )
- Rooftop installations for multi-tenant houses
- Providing public access via the omnidirectional antenna
How to reset
- Press reset
- Apply power
- Watch the power led, once it blinks, STOP pressing the reset button
- It will beep one time
- Once you hear two beeps, you should be able to access it.
How to upgrade the firmware
- Upload the routeros-mipsbe-x.x.x.npk file in http://192.168.88.1/webfig/#Files
- Select System Reboot
How to downgrade firmware
- Upload the routeros-mipsbe-x.x.x.npk file in http://192.168.88.1/webfig/#Files
- Go to Terminal and type
/system package downgrade;
Configuration Instructions:
Standard Omnitik mesh config:
1. Download Stable Firmware and Generate Configuration
Don't use version 7 of firmware. It won't work with the configgen file! Make sure your firmware is v6.x.x.
You will need your Network Number or NN. You can find out your NN using your Install Number (request number) received by email when you registered. To find out what is your NN please see Network Number.
If you do not have a NN (the tool returns "No NN assigned") please reach out on Slack to have one assigned to you.
- Download the latest stable v6 firmware - see Mikrotik Firmware.
- Generate a configuration file for your Network Number by going to the NYC Mesh configuration generator. Configgen. Type in the network number and click “Download Config”. For SXTsq config file see below
2. Connect to the Router
- To connect to the Omnitik wirelessly, find the router’s default SSID (Mikrotik-XXXX) and connect to it.
- To connect with a cable, plug one end of a patch cable into the Omnitik’s Port 2 and the other end into your computer’s LAN port. Set your computer to DHCP (automatic) and it will get an address like 192.168.88.xxx.
- Navigate to the default Mikrotik IP of 192.168.88.1 in your web browser. This will open the Mikrotik GUI. The default username is admin and there is no password.
3. Upload Firmware
- Open the Mikrotik GUI in your browser.
- Click “Webfig” in the top right corner.
- Click “Files” in the left side menu.
- Click “Choose File” at the top.
- Navigate to where you saved the firmware, select the file and click “Open”. You will see the file appear in the interface.
- Wait for the firmware to fully upload (you will see the upload progress in the bottom left corner). This firmware will automatically be installed when you reboot with the new configuration (see next section).
4. Upload Configuration
- If you are using a Mac or Linux operating system, go into Terminal, navigate to the folder where you’ve saved the config and enter the following command:
scp -o StrictHostKeyChecking=no rooftop-ospf.rsc admin@192.168.88.1:flash/
- If you are using a Windows operating system, go into Command Prompt, navigate to the folder where you’ve saved the config and enter the following command. You must download pscp.exe from PuTTY (64-bit or 32-bit) to the same folder then run:
pscp -scp rooftop-ospf.rsc admin@192.168.88.1:flash/
If asked “Dangerous Reset anyway?”, type in Y and return/enter.
Reopen the Mikrotik GUI in your web browser and navigate back to “Files” as described in section 3 above. You should see the config file you just uploaded.
-
- Click “System” in the left side menu.
- Click “Reset Configuration” in the left side menu dropdown. Select the following options:
- No Default Configuration
- Run After Reset: flash/rooftop-ospf.rsc (click the popup on the right to select this)
- Click "Reset Configuration"
- The Omnitik will now reboot (and install new firmware if you uploaded it). If it plays some beeps, ending with a short tune Kernkraft 400, the configuration was a success!
The Omnitik IP address has changed to a 10.69.x.x address. This is generated from the network number, e.g. for network number 1234 the IP address will be 10.69.12.34. Please see Network Number for additional information about finding your devices IP if needed.
5. Change the Password
- Click “System” in the left side menu, then click “Password”.
- Leave the "Current Password" blank and enter the standard omni password in "New Password" and "Confirm Password".
6. Confirm POE output is on if required
Most installs have a LiteBeam or other device that's connected to the Omni. This device uses power from the omni's port, so POE out on that port must be turned on. Typically a LiteBeam is connected to Port 5, so POE out must be turned on for ether5.
If you used the omni-poe-ether5 template on configgen, this will already be done for you.
- Click on "Interfaces" in the left sidebar menu.
- Click on ether-5 (or whichever port the device that needs power is on)
- Set "POE Out" to "forced on"
Omnitik config
Here are the current config instructions. As discussed in the MikroTik Specifics page, these devices need a script to be generated and loaded onto the device rather than a saved config file.
We now have a script generator you can find here https://configgen.nycmesh.net/
Here is a slideshow of configuring an OmniTik
Wireless interface explanation
wlan1- SSID example:
nycmesh-136-omni - AP bridge (MikroTik term)
- manually connected to by other Omni's to avoid route flapping behavior exhibited by the automatic mesh (
wlan3)
- SSID example:
wlan2- SSID example:
-NYC Mesh Community WiFi- - Also ap bridge
- only difference to
wlan1is bridge filter and and ip firewall rule
- SSID example:
wlan3- SSID example:
nycmesh-wds - wds slave
- all automatic mesh connections communicate through this interface
- wds bridge
- is not running a dhcp server
- OSPF will route to other connections first since bridge for this interface is higher at 100
- SSID example:
wlan4- station bridge for connecting to an access point ex.
wlan1
- station bridge for connecting to an access point ex.
Expand for `OLD nycmesh-omnitik-v3.2.rsc` example
The is our obsolete 3.2 template script which needs some variables filled in.
This script only works on the OmniTik 5ac PoE model
Version 3.2 Changelog:
- Separation of Public vs Tenant subnet
- Fixed BGP sync missed config parameter
- Startup delay ( ref Mikrotik forums )
- Tada sound effect
- Better firewall rules
:global nodenumber 1111
:global bgpasn 61111
:global ipprefix "10.70.111"
:global iptenantsrange 10.70.111.5-10.70.111.119
:global iptenantsgw 10.70.111.1
:global ippublicrange 10.70.111.130-10.70.111.180
:global ippublicgw 10.70.111.129
:global dns 10.10.10.10,1.1.1.1
/delay 15
:for j from=1 to=4 step=1 do={ :for i from=2000 to=50 step=-400 do={ :beep frequency=$i length=11ms; :delay 11ms; } :for i from=800 to=2000 step=400 do={ :beep frequency=$i length=11ms; :delay 11ms; } }
:foreach x in=[/interface wireless find] do={ /interface wireless reset-configuration $x }
:for t from=1200 to=350 step=-50 do={ :beep frequency=$t length=33ms; :delay 33ms; }
:beep frequency=500 length=100ms
/ip address add address=192.168.88.1/24 interface=ether3 network=192.168.88.0
:beep frequency=600 length=100ms
/interface ethernet set [ find default-name=ether5 ] poe-out=forced-on
:beep frequency=700 length=100ms
/interface wireless security-profiles add authentication-types=wpa-psk,wpa2-psk management-protection=allowed mode=
dynamic-keys name=nycmeshnet supplicant-identity=nycmesh
wpa-pre-shared-key=nycmeshnet wpa2-pre-shared-key=nycmeshnet
:beep frequency=800 length=100ms
/interface wireless set [ find default-name=wlan1 ] band=5ghz-a/n/ac channel-width=20/40/80mhz-Ceee disabled=no distance=indoors frequency=auto mode=ap-bridge security-profile=nycmeshnet ssid=("nycmesh-" . $nodenumber . "-omni") wireless-protocol=802.11 wps-mode=disabled add disabled=no master-interface=wlan1 name=wlan2 ssid="-NYC Mesh Community WiFi-" wps-mode=disabled
:beep frequency=900 length=100ms
/interface bridge add auto-mac=yes name=publicaccess add auto-mac=yes name=tenants
:beep frequency=1000 length=100ms
/ip address add address=($ipprefix . ".1/25") interface=tenants network=($ipprefix . ".0") add address=($ipprefix . ".129/26") interface=publicaccess network=($ipprefix . ".128")
:beep frequency=1100 length=100ms
/interface bridge port add bridge=tenants interface=ether1 add bridge=tenants interface=ether2 add bridge=tenants interface=ether3 add bridge=tenants interface=ether4 add bridge=tenants interface=wlan1 add bridge=publicaccess interface=wlan2
:beep frequency=1200 length=100ms
/ip pool add name=tenants ranges=$iptenantsrange add name=publicaccess ranges=$ippublicrange
:beep frequency=1300 length=100ms
/ip dhcp-server add address-pool=tenants disabled=no interface=tenants name=tenantsdhcp add address-pool=publicaccess disabled=no interface=publicaccess name=publicaccessdhcp
:beep frequency=1400 length=100ms
/routing bgp instance set default as=$bgpasn disabled=no
:beep frequency=1500 length=100ms
/routing bgp network add network=($ipprefix . ".0/24") synchronize=no
:beep frequency=1600 length=100ms
/ip dhcp-server network add address=($ipprefix . ".0/25") dns-server=10.10.10.10 gateway=($ipprefix . ".1") netmask=25 add address=($ipprefix . ".128/26") dns-server=10.10.10.10 gateway=($ipprefix . ".129") netmask=25
:beep frequency=1700 length=100ms
/ip firewall filter add action=accept chain=input protocol=icmp add action=drop chain=forward in-interface=publicaccess out-interface=tenants add action=drop chain=input in-interface=publicaccess add action=accept chain=forward add action=accept chain=input
:beep frequency=1800 length=100ms
/system clock set time-zone-name=America/New_York /system identity set name=("nycmesh-" . $nodenumber . "-omni")
:beep frequency=500 length=200ms;
:delay 500ms;
:beep frequency=500 length=200ms;
:delay 200ms;
:beep frequency=800 length=500ms;
:delay 50ms;
How to apply config:
- Acquire config parameters ( BGP ASN, IP range, node number, etc. )
- Fill in config file parameters at the top of the script.
Save as nycmesh-omni-####.rsc where #### is your node number.
The file must be named with.rscat the end.
- Factory Reset device if needed ( see MikroTik Specifics for details )
( Connect to a port besides Port 1 ) - Update firmware to latest on your device ( see Mikrotik Firmware )
- Upload the rsc file
- The file needs to be in the
flash/folder. However, there is no way to create a folder from the device. - Instead you need to upload the file using scp.
- From a Mac or Linux desktop, upload the file using scp:
scp nycmesh-omni-####.rsc admin@192.168.88.1:flash/
You may need to confirm the SSH key ( typical with SSH ) - From a Windows desktop, you must have PuTTY installed and run the following command from the command prompt:
pscp -scp nycmesh-omni-####.rsc admin@192.168.88.1:flash/ - You should see the file in the WebUI as
flash/nycmesh-omni-####.rsc
- The file needs to be in the
- Factory Reset the device with the option to restore this script.
- From Web UI:
- WebFig > System > Reset Configuration. Select:
- No Defaults
- Run After Reset:
flash/nycmesh-omni-####.rsc - Apply
- Or from CLI:
/system reset-configuration run-after-reset=flash/nycmesh-omni-####.rsc no-defaults=yes- Dangerous Reset anyway? Y
- From Web UI:
