Typical Installs
Please read our FAQ if you haven't already.
The intention of this page is not to be technical but rather give to the non-technical person an understanding of a typical installation.
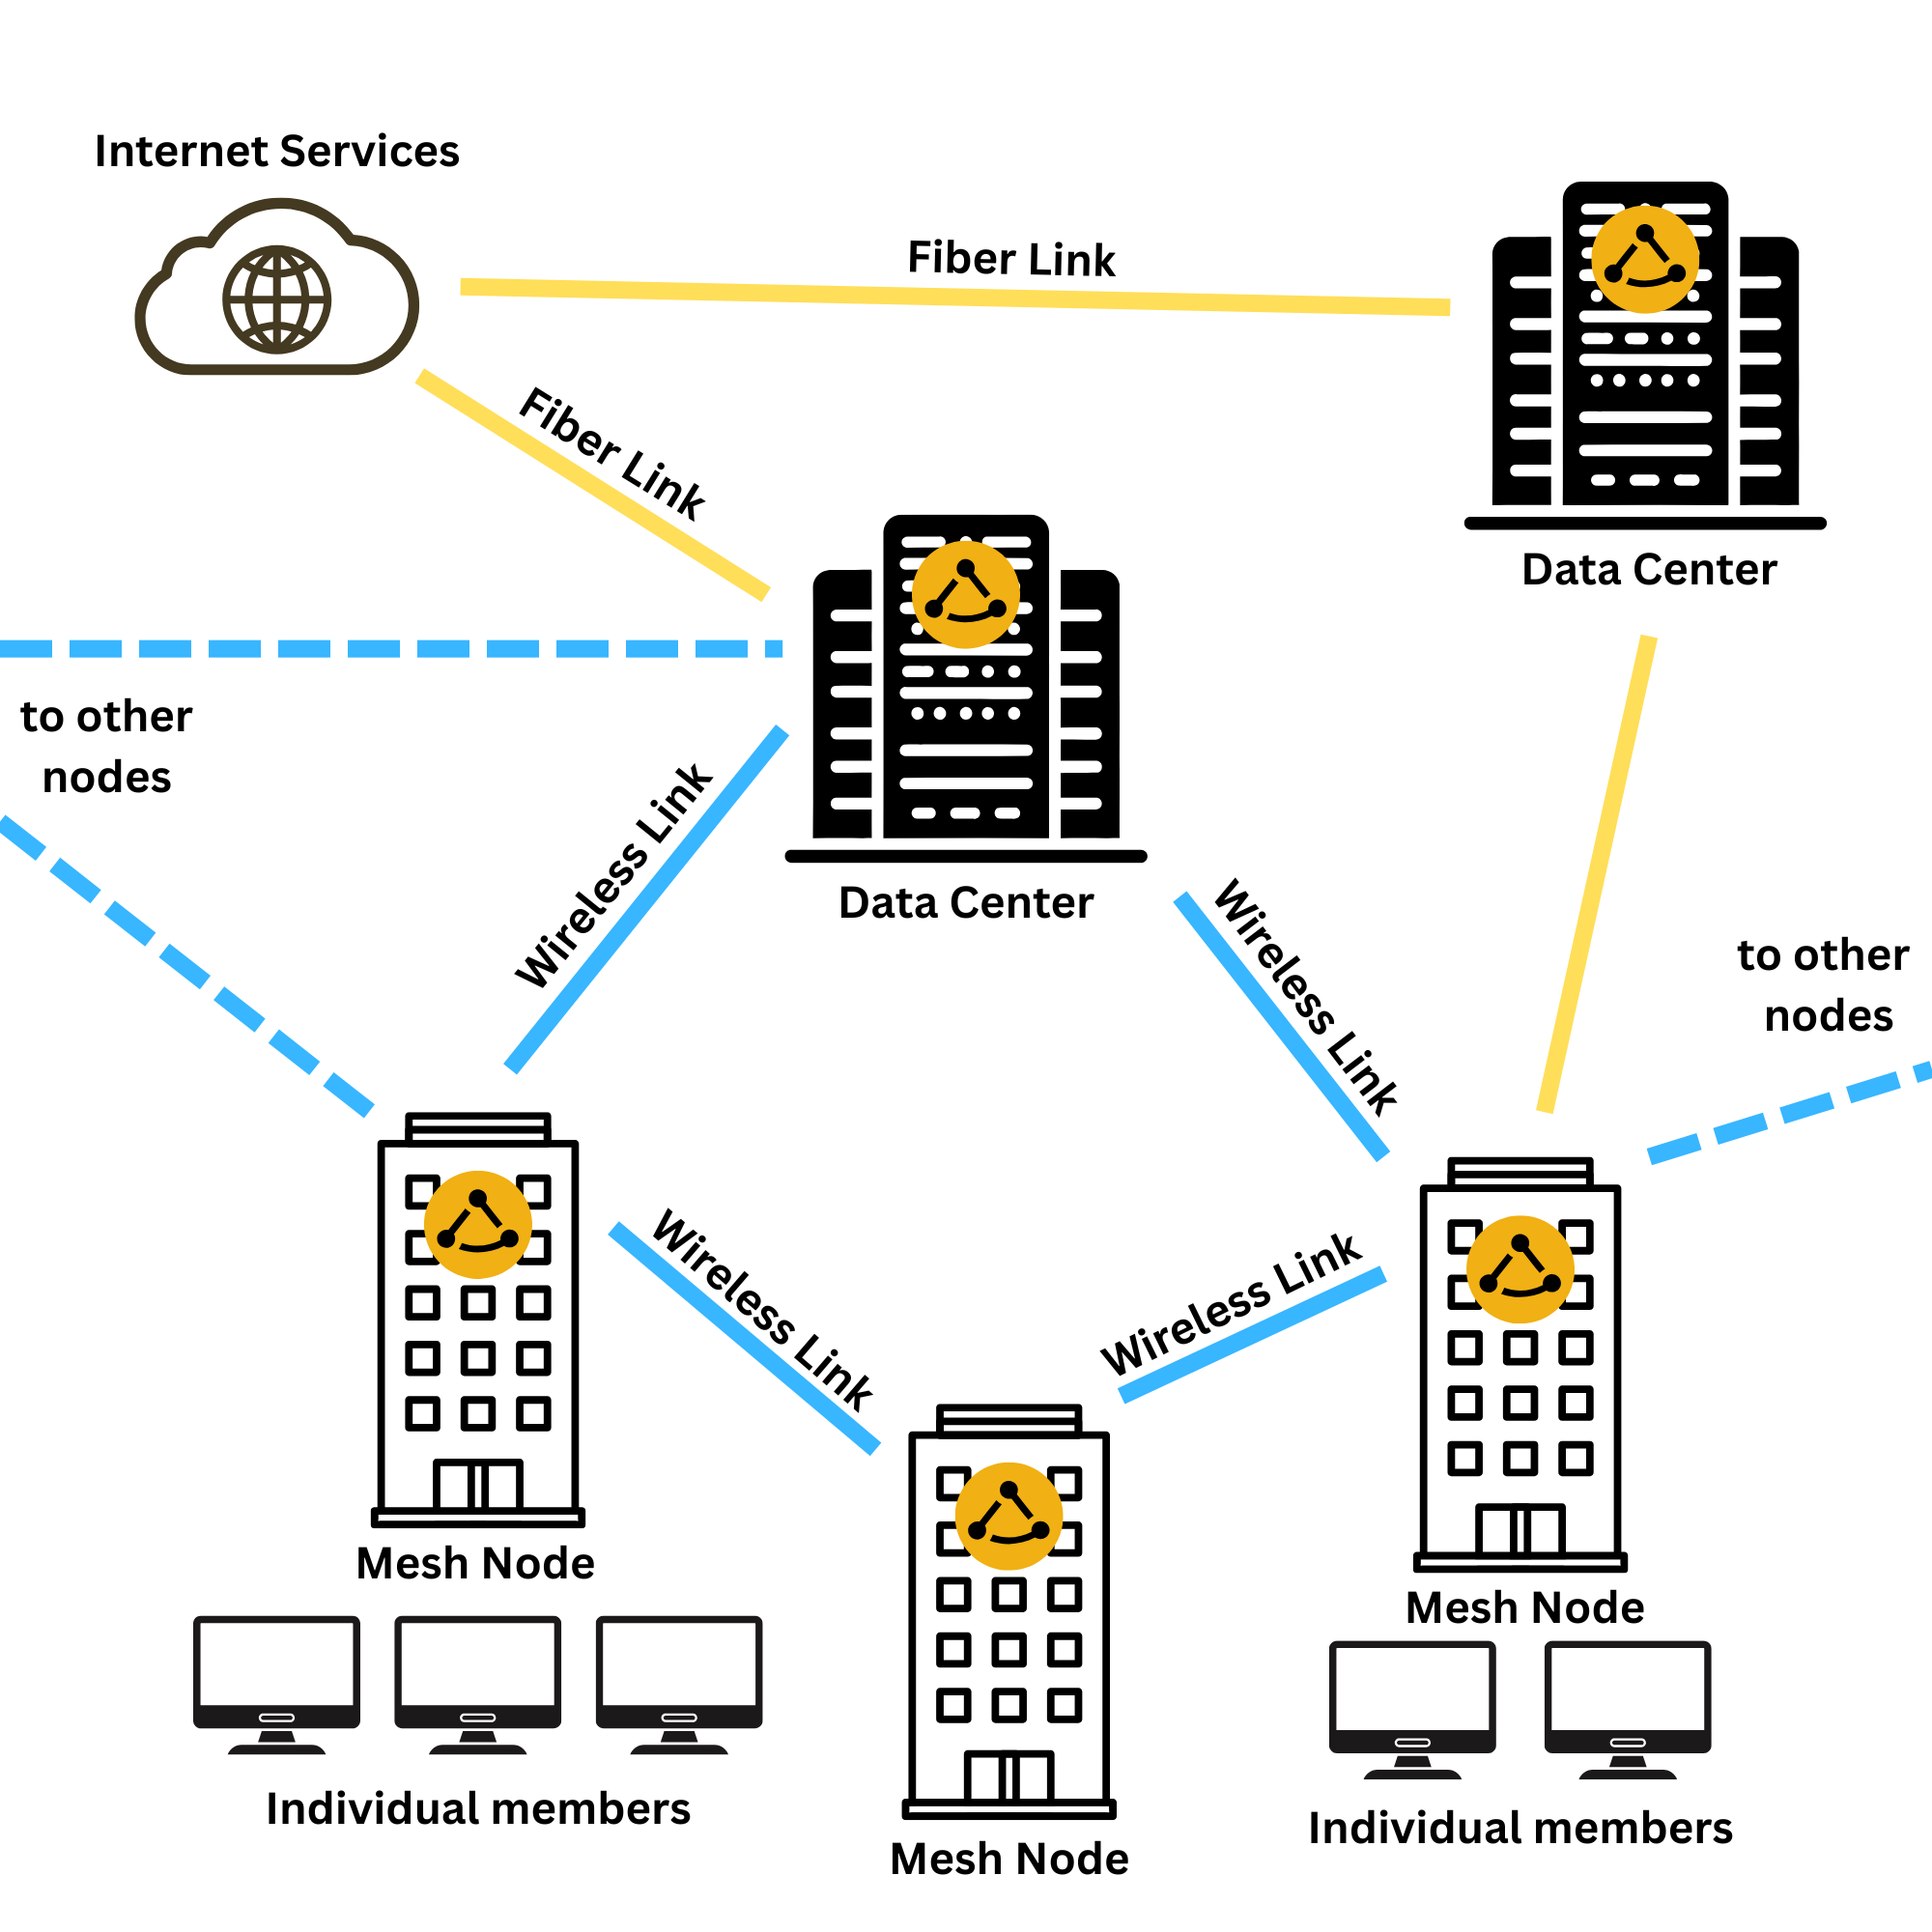
General Mesh Network Layout:
The NYC Mesh network is a hybrid "over the air" and fiber network. We use a combination of fiber optics cables buried in the street and wireless links between rooftops to build the network across the city. The majority of our network is wireless, with a backbone of fiber links primarily between our data centers and major buildings.
The aim of our network is to connect rooftop to rooftop, using different types of equipment based on geography and topology. Using this mix of technology, we aim to expand the NYC Mesh network coverage from block to block across the city. The idea of NYC Mesh is to share the connectivity with neighbors, share resources, share equipment, share the network. Create a community of communities connecting to each other.
NYC Mesh typically uses two categories of equipment:
-
In the first category is equipment that "speaks" AirMAX (AirMax protocol).
Some hubs and supernodes have antennas covering a sector, or 360°, that "speak" AirMax. To connect to those, you need to install on your roof an antenna that understands that same AirMax protocol (see Ubiquiti equipment). -
The second category of equipment uses the same WiFi as your home router, 802.11 (there are different versions of wifi- 802.11a/b/g/n/ac) (see Mikrotik equipment). Any device should be able to connect to this "standard WiFi" network, though we typically use Mikrotik devices at both ends of the connection.
Rooftop Installs - Typical Mesh Rooftop Node:
Most NYC Mesh installs are generally pretty similar for most building. There are two setups usually deployed, depending on how the building connects to the rest of the network, either with or without a LiteBeam.
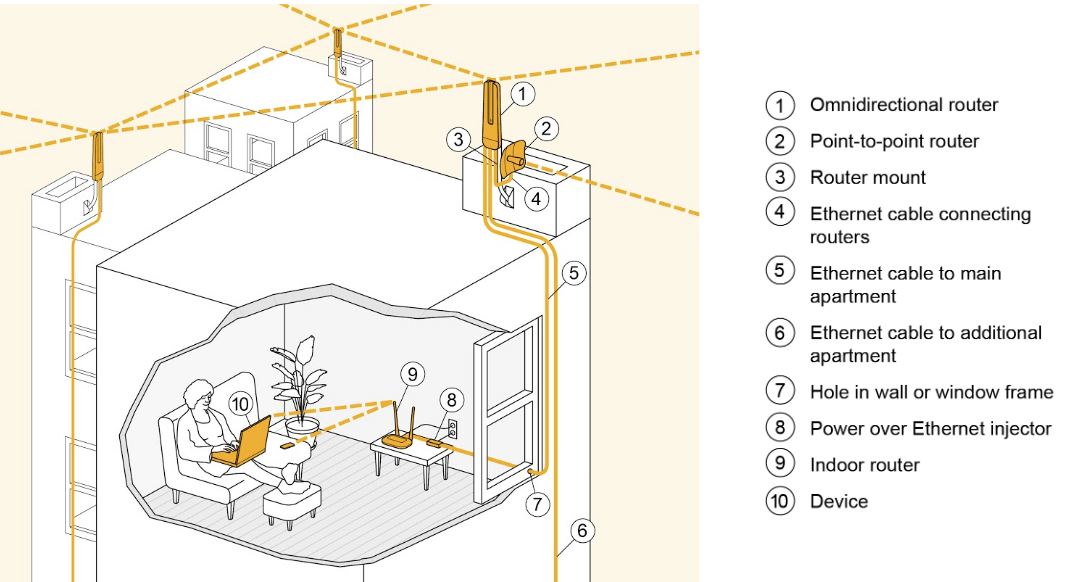
Both styles of installs use an Omnitik router placed on the roof, which provides short range wireless connections to nearby buildings and serves as the main router for that node. Cables are then run down the building to member's apartments, where a home WiFi router provides a WiFi network for the member to connect their devices.
Here are the two most common setups:
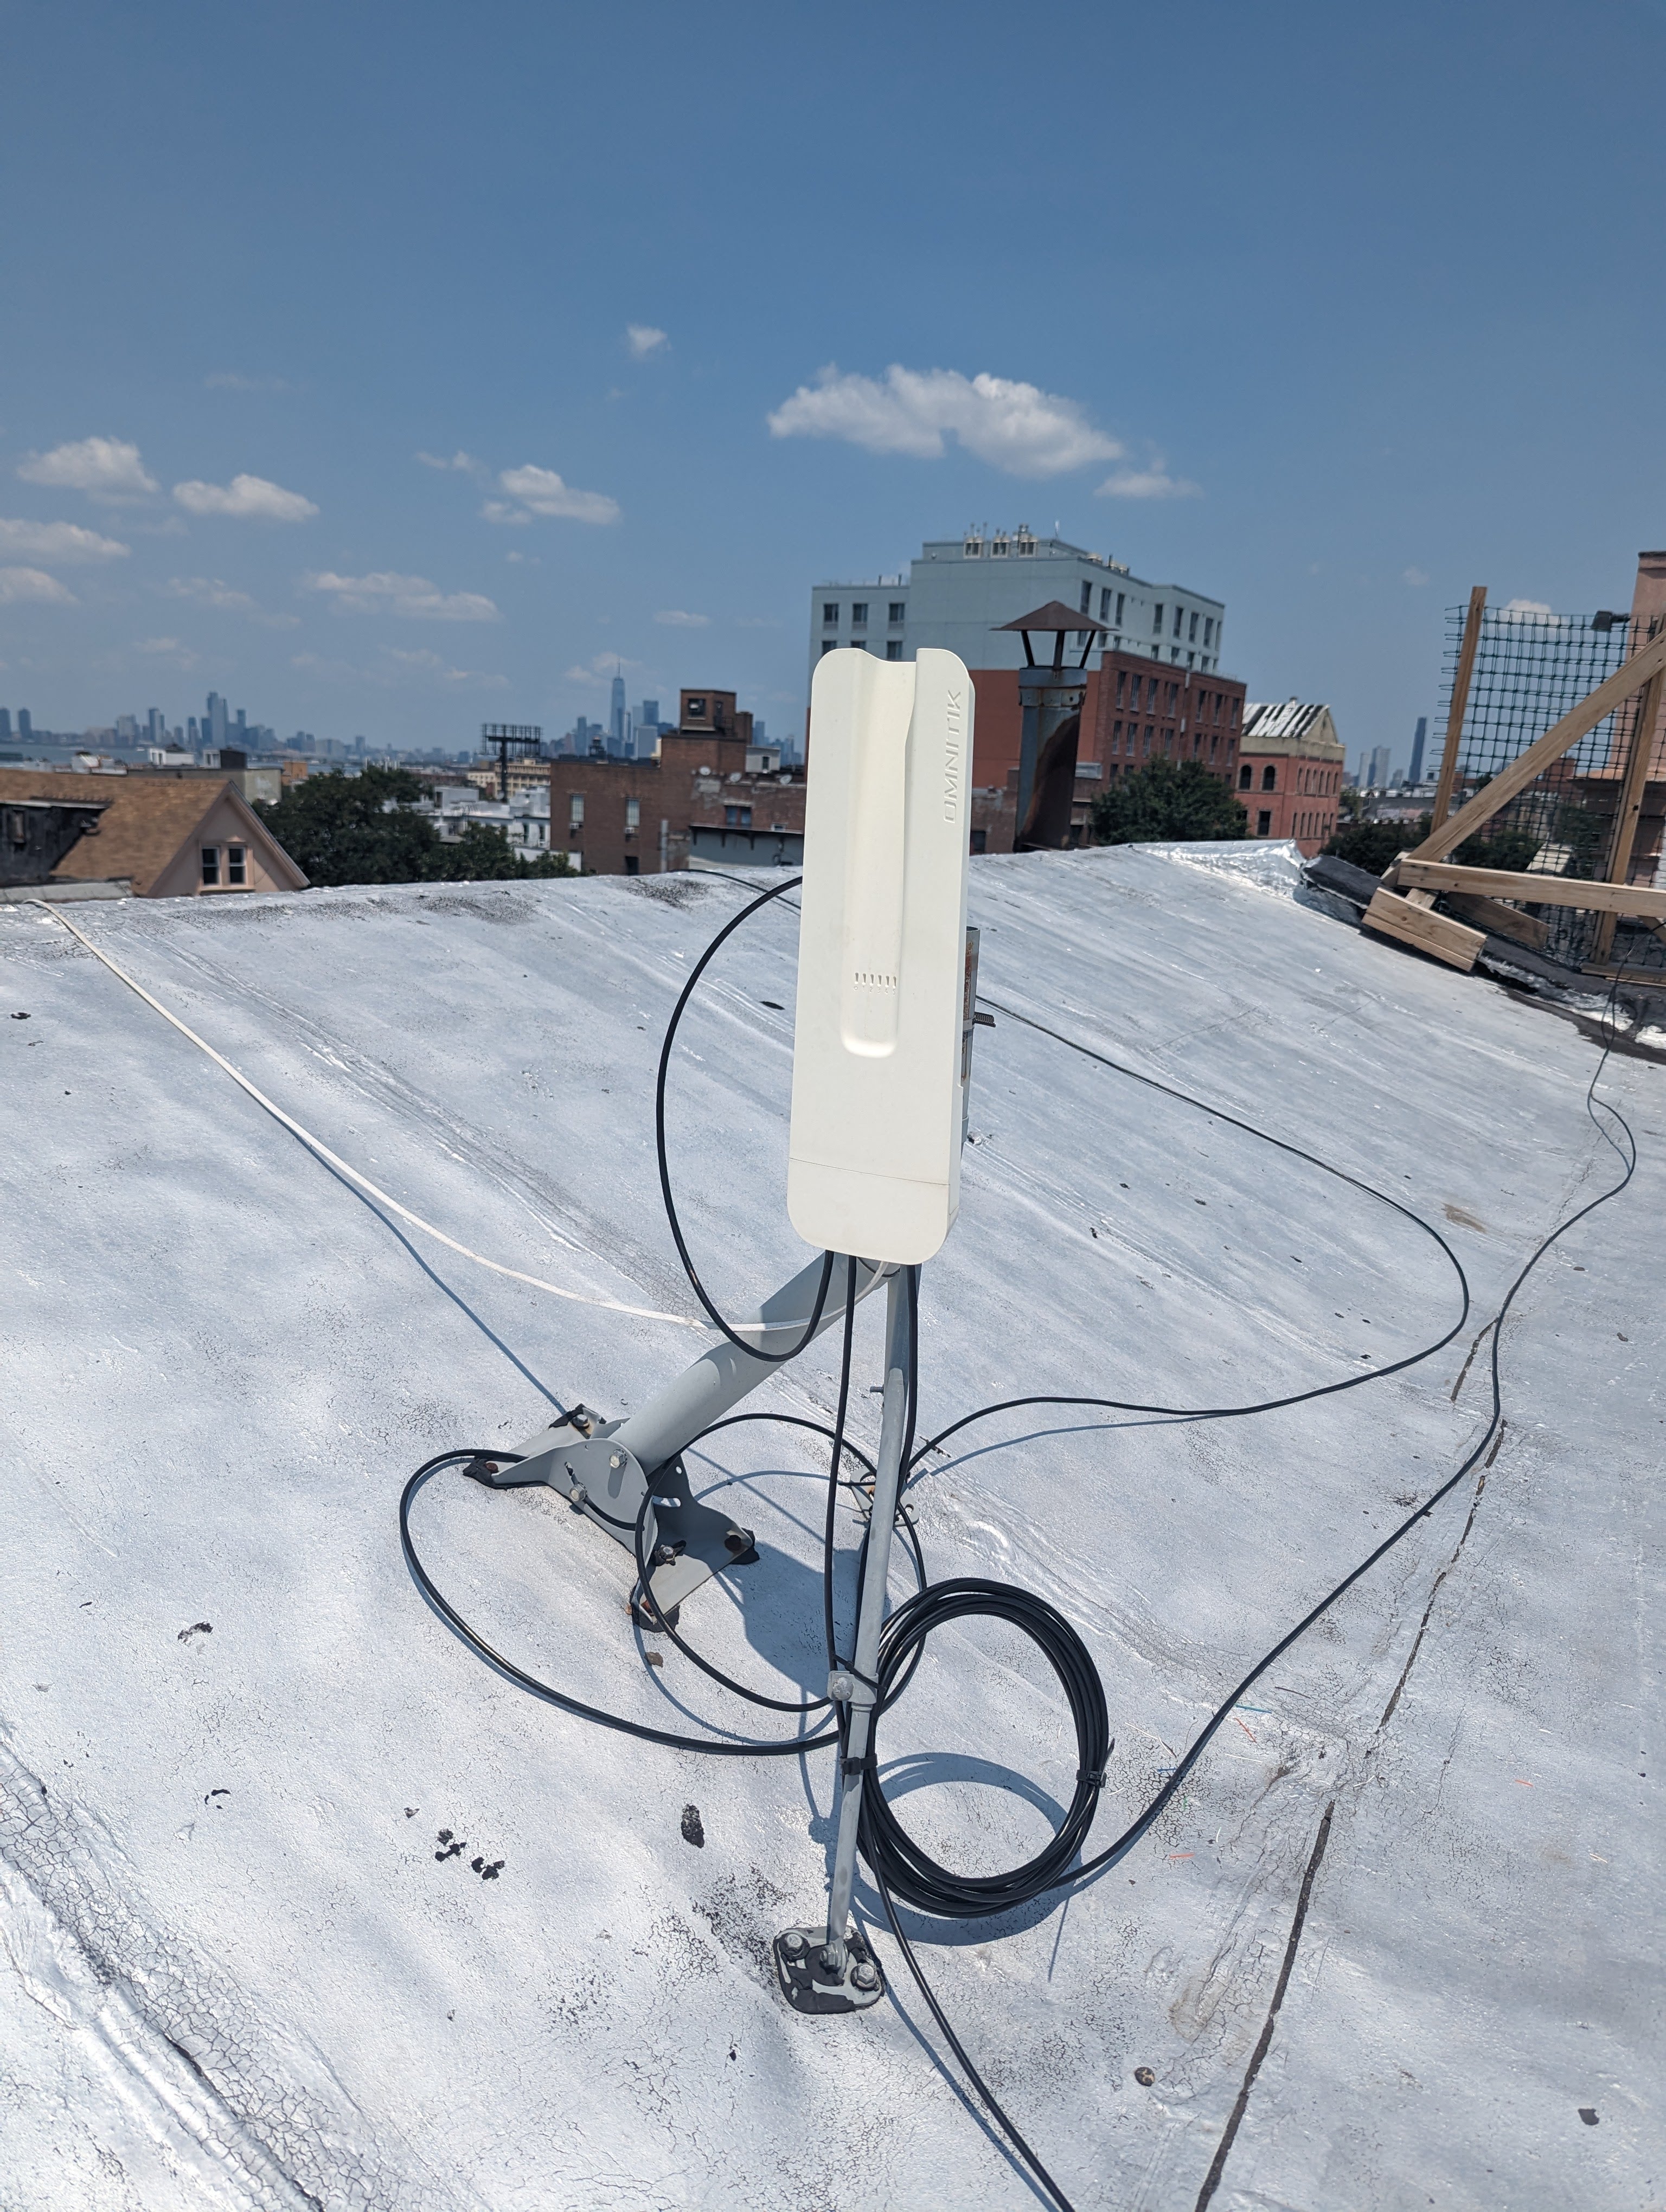
Omnitik + LiteBeam rooftop node
The most typical NYC Mesh node setup is a rooftop with an Omnitik plus a LiteBeam.
This type of node uses a LiteBeam antenna to connect to a LiteAP sector antenna on a nearby hub.
One cable runs to the roof from the apartment, which plugs into the Omnitik. The LiteBeam is plugged into another port (typically port 5) on the Omnitik, which provides it with power.
The rooftop setup is powered from a member's apartment via a POE injector that sends power up the cable to the roof. Usually this POE is in the first apartment connected to the mesh, but is sometimes moved as people move out or if there is a better location available.
For a technical breakdown of the routing and IP structure of this node, see Typical Install Technical Diagrams page
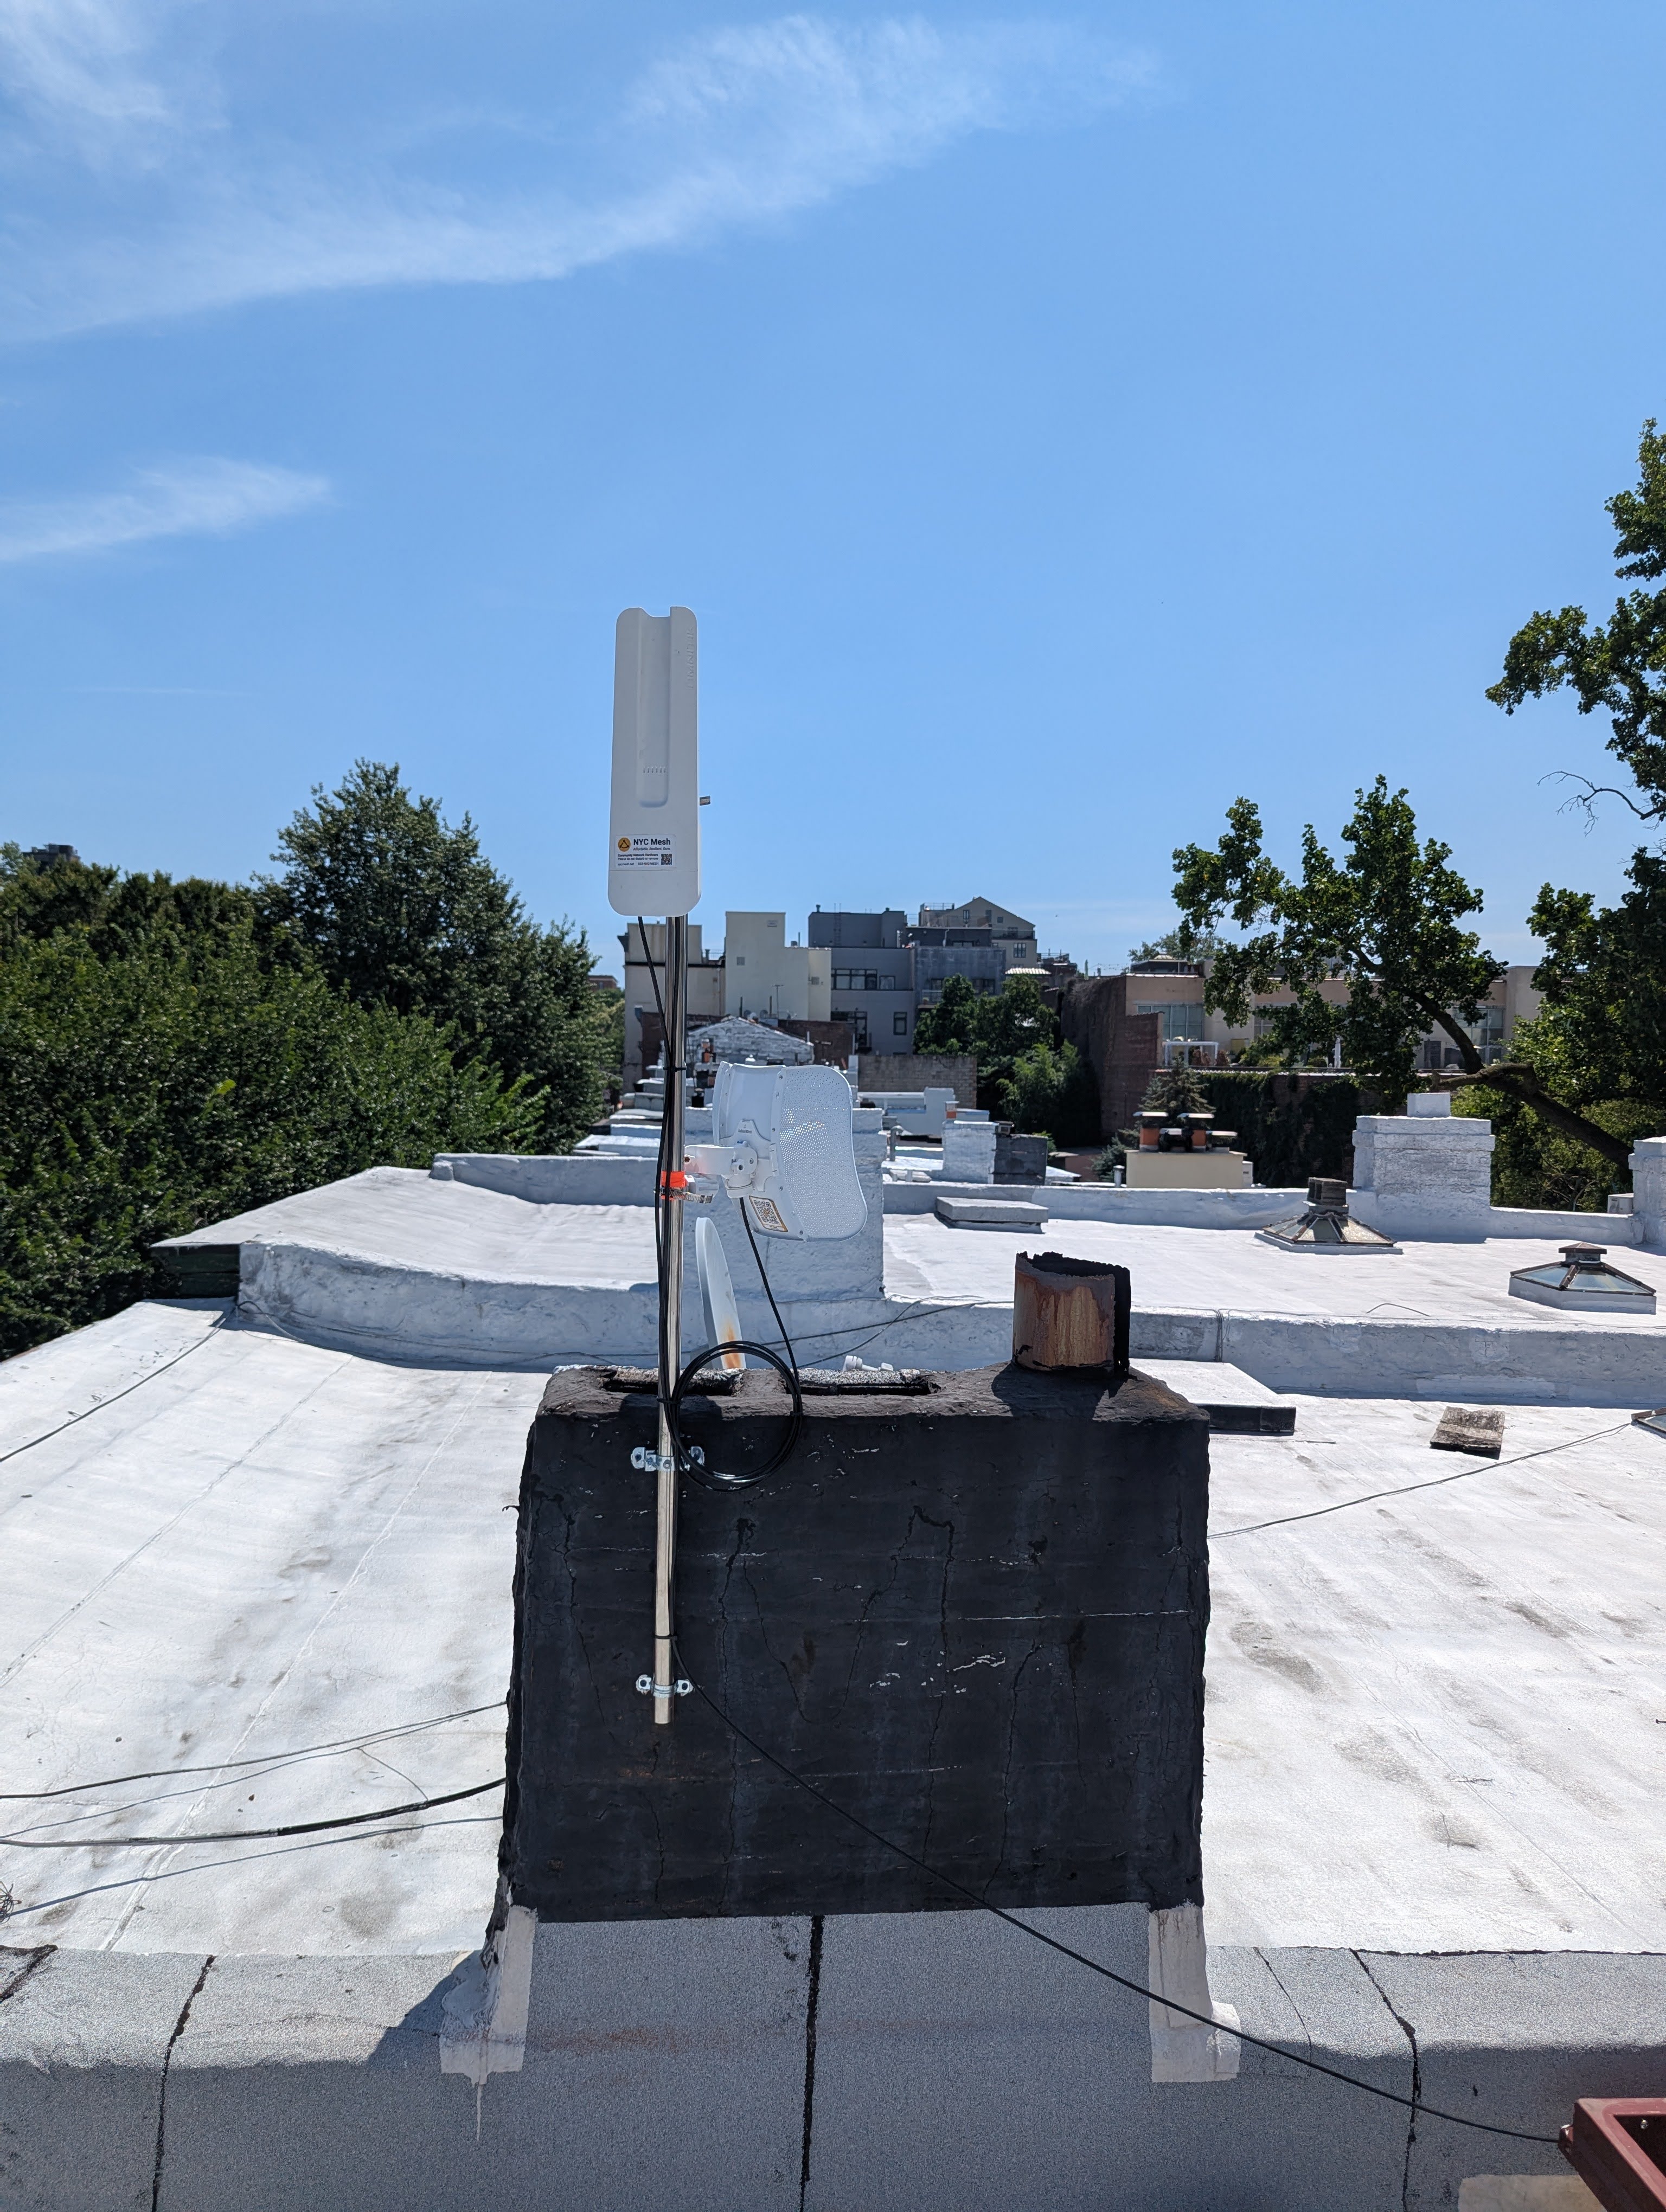
"Omni Only" rooftop node
Nodes which are located next to an existing node may sometimes be installed without a LiteBeam. We call these nodes "Omni Only" nodes, as they rely on their nearby neighboring nodes for their connection to the rest of the network.
In the example below, nodes A, B and D have LiteBeams that connect to a nearby hub, while node C is "omni-only". Node C relies other nearby nodes to connect to the rest of the network (while also serving as an intermediate "bridge" node between A,B and D).
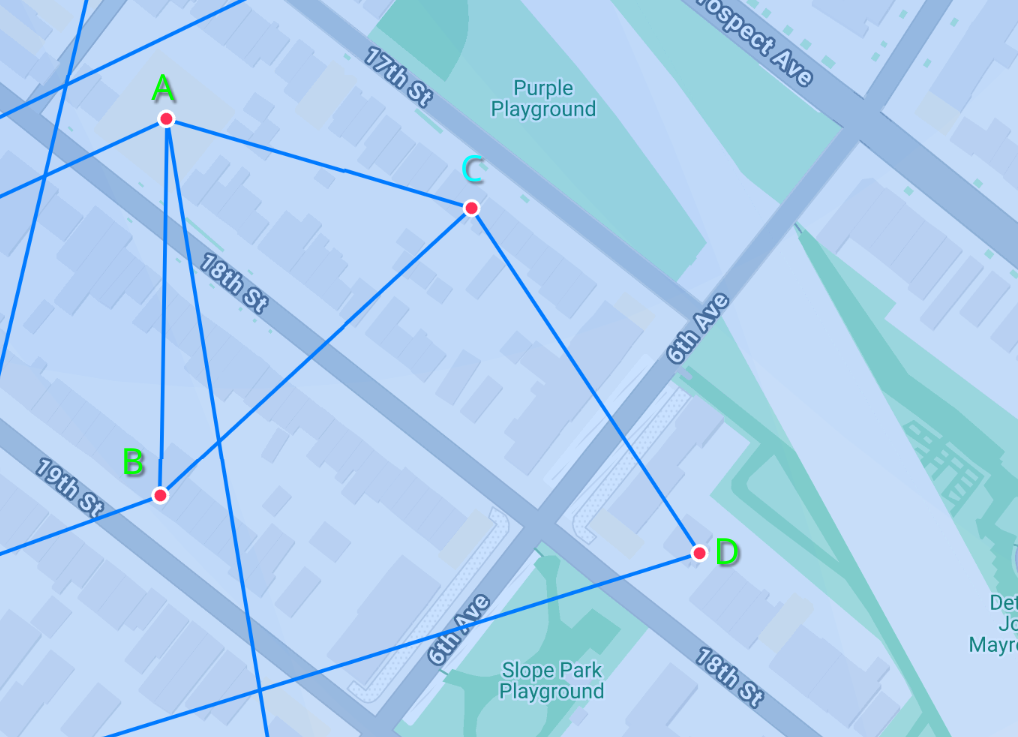
Generally we try to ensure there are at minimum two nodes with LiteBeam in each "cluster" to ensure there is a backup if the main uplink node goes down.
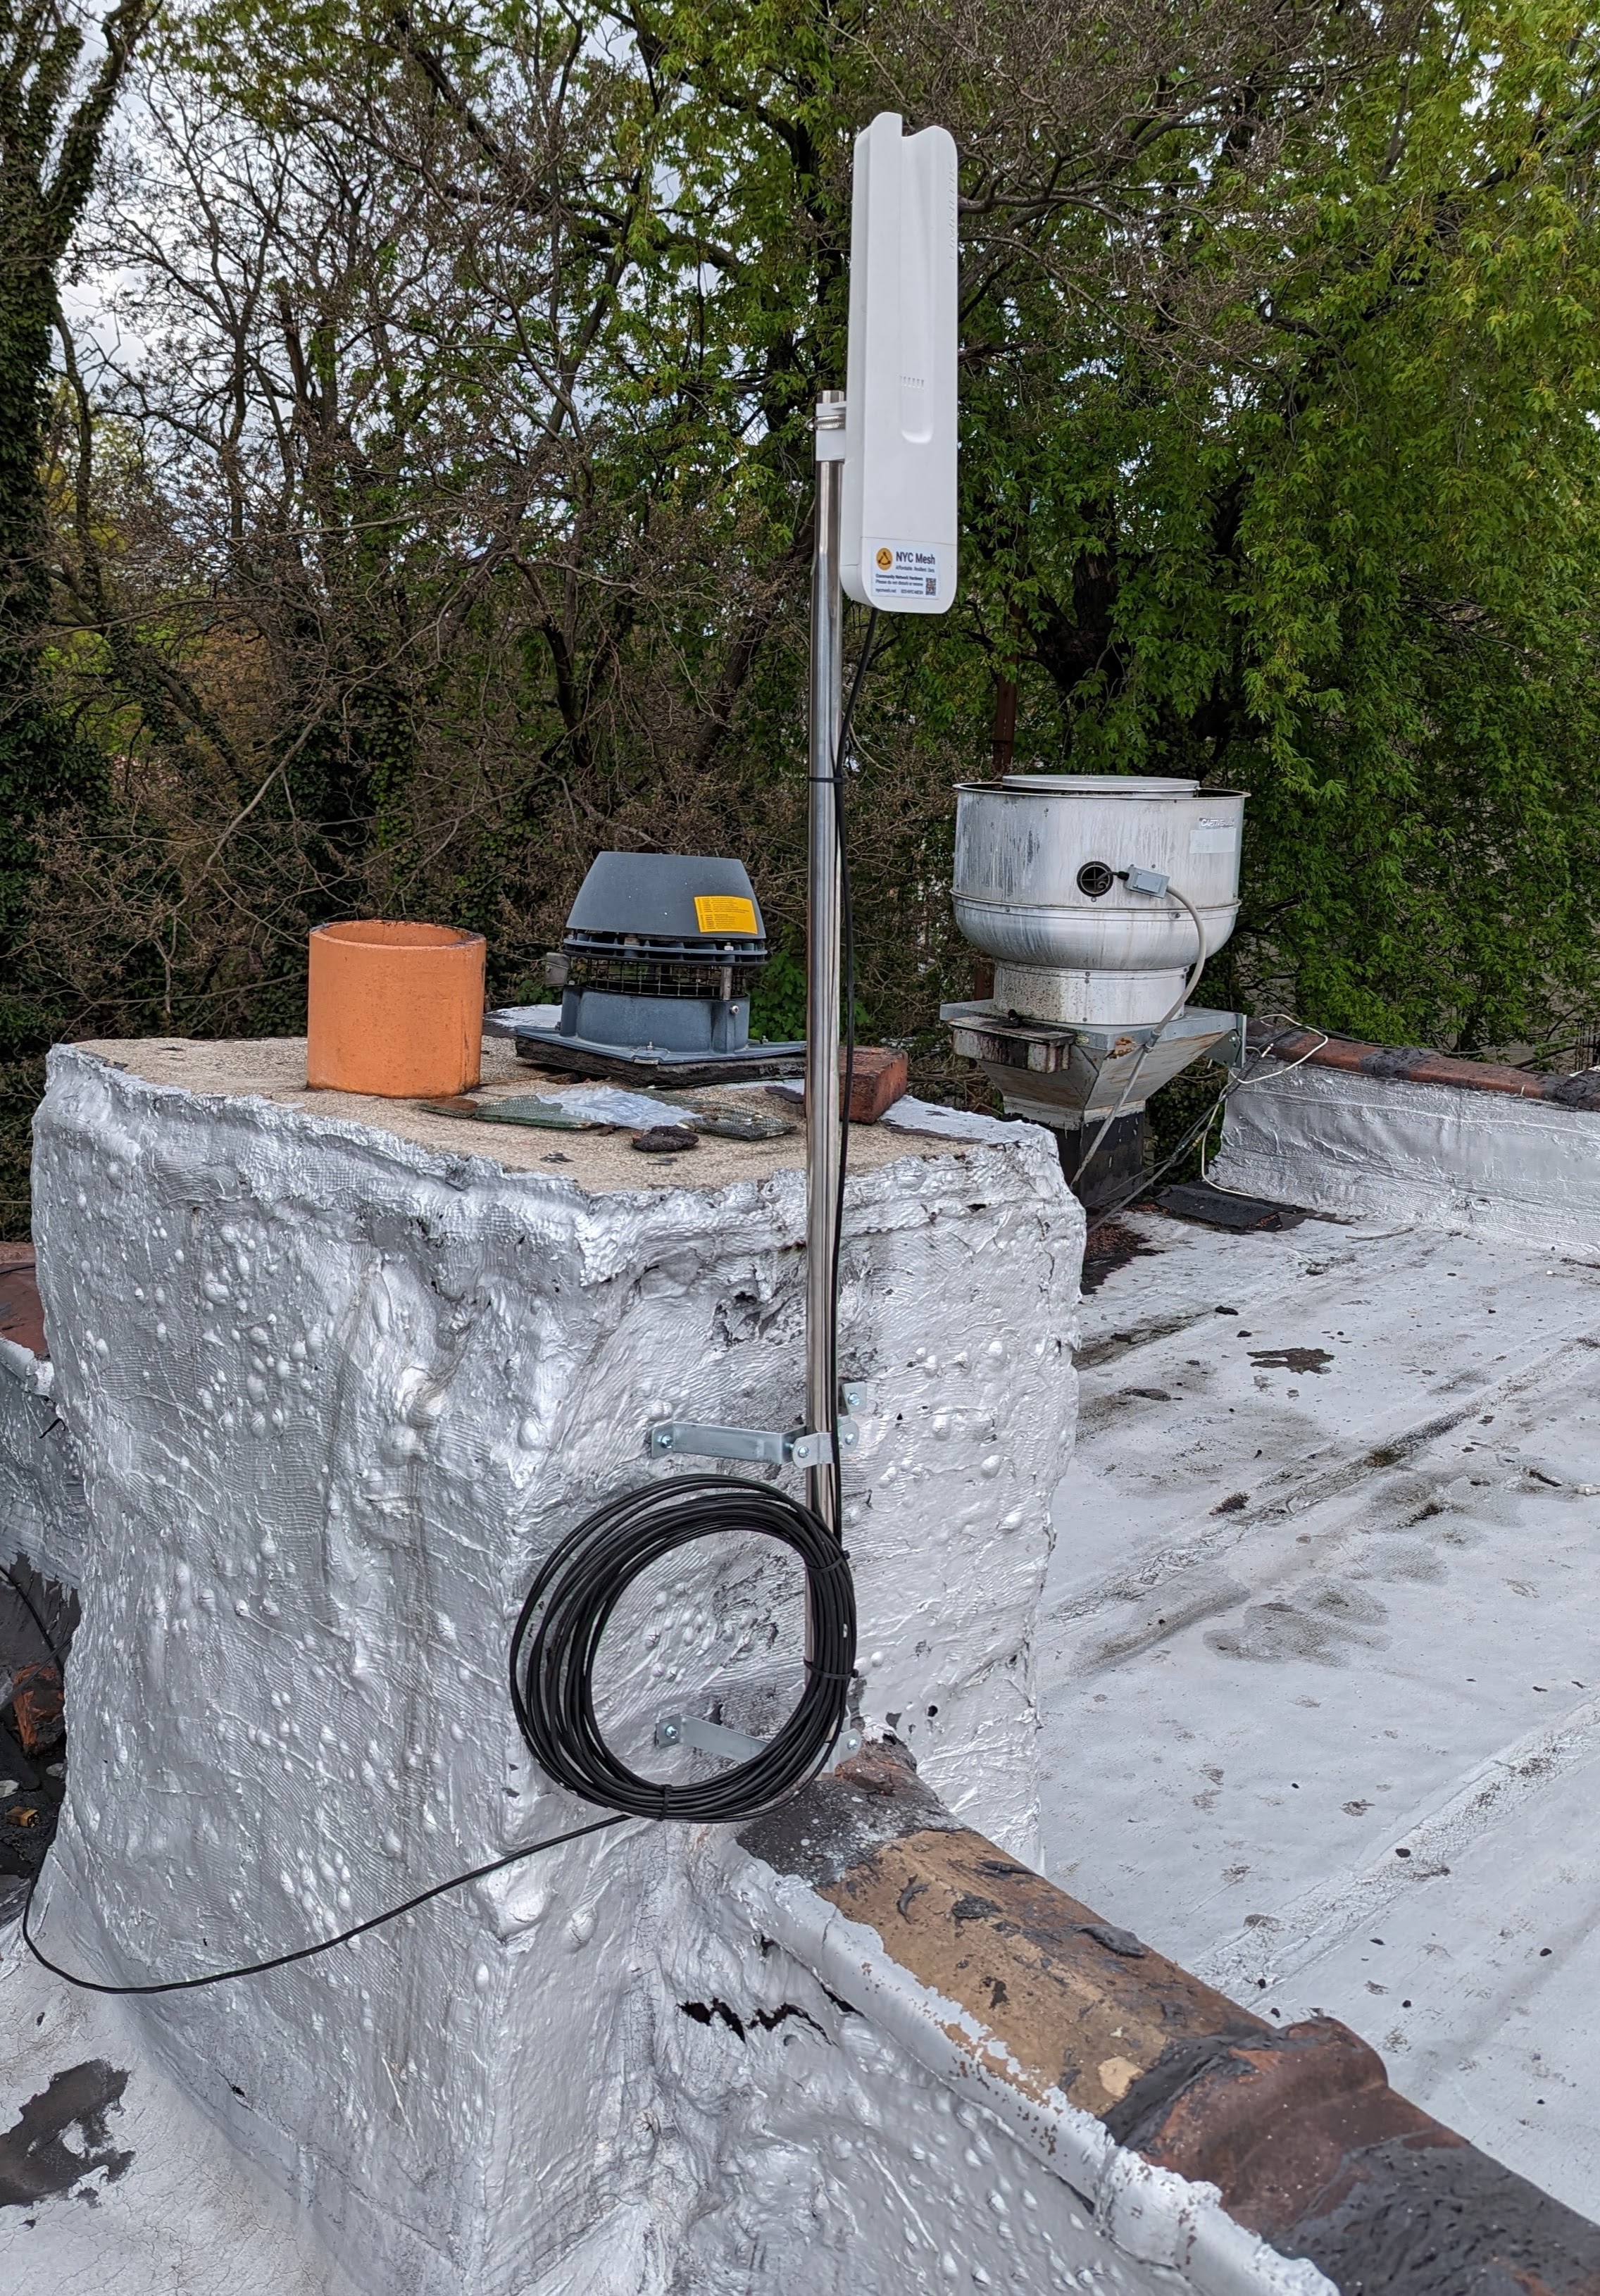
Here is a omni-only install on a rooftop.
See this page for a technical diagram about how the routing works for an omni-only install Omni-only technical diagram
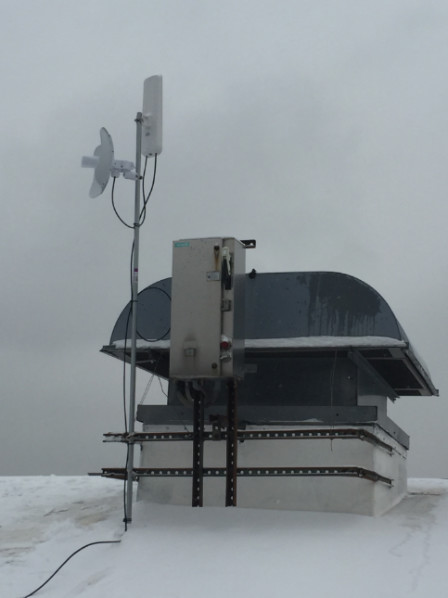
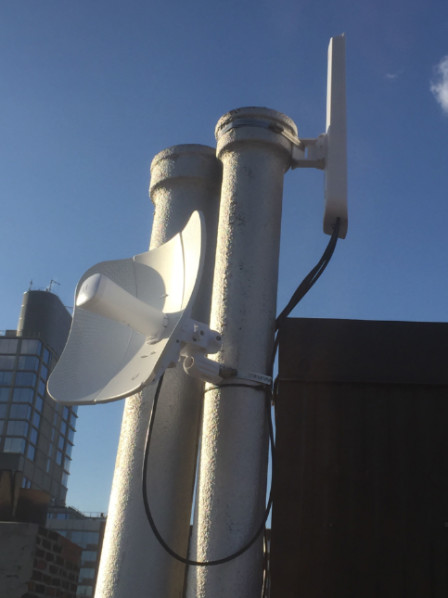
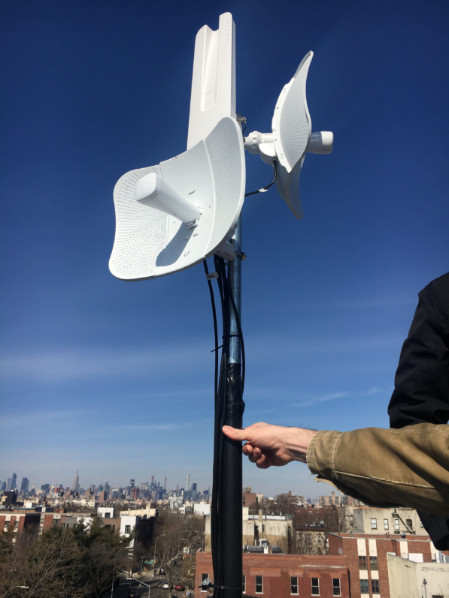
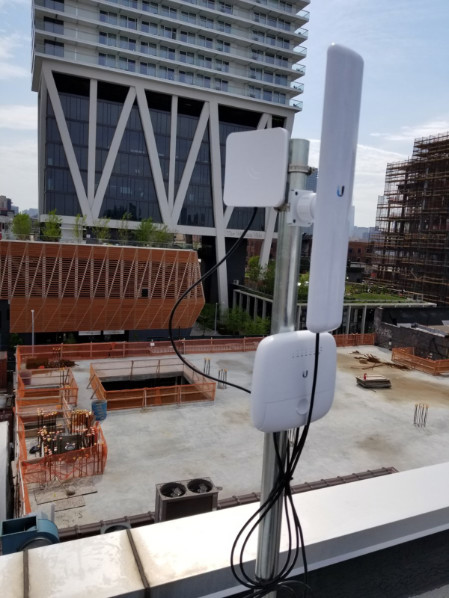
Depending on the roof environment and what is available, mesh antennas can be mounted to the roof in a number of ways.
Many times, existing TV antenna masts, satellite dish mounts or other existing brackets can be re-used, so we do not need to drill new holes to mount the antennas. All the antennas in the images below were mounted to previously abandoned existing mounts and brackets on rooftops.
In some cases, when there's no suitable existing mount that can be reused, we may need to drill holes and attach a new mount.
This is always done with the permission of the landlord or homeowner and steps are taken to seal any holes that are drilled to avoid leaks in the future.
Holes are drilled in chimneys, bulkheads or walls and never into the roof surface / waterproof membrane itself.
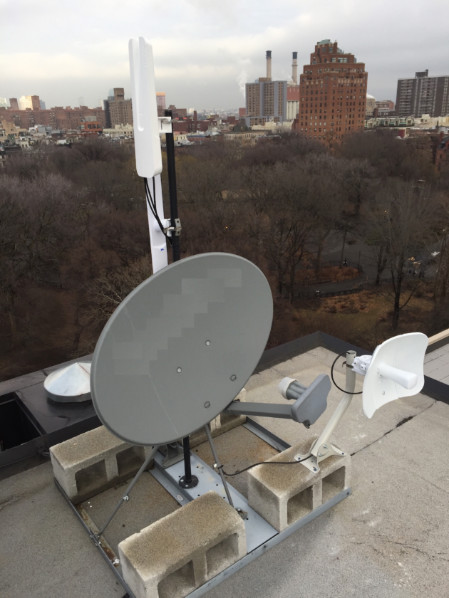
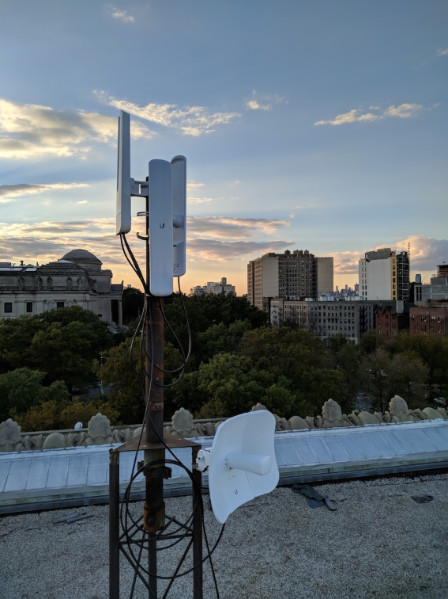
A good rooftop can be "beefed up" to allow for more connectivity.
If the rooftop is valuable to the mesh (at a good location, it's high enough, etc) we may install additional antennas to provide coverage to other nearby buildings or build additional backbone network routes for the network.
We may also install additional higher bandwidth antennas and additional network equipment to support buildings with a higher number of members.
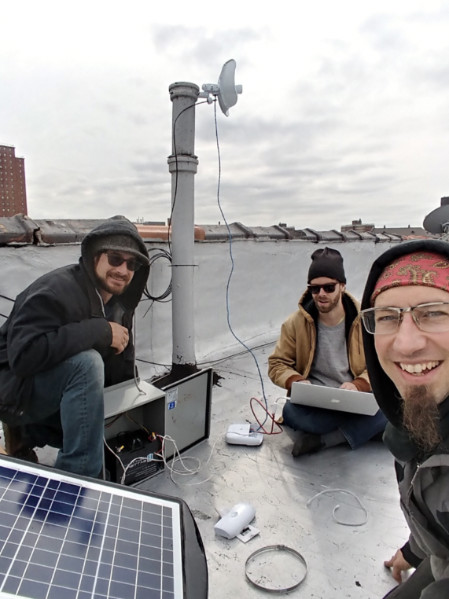
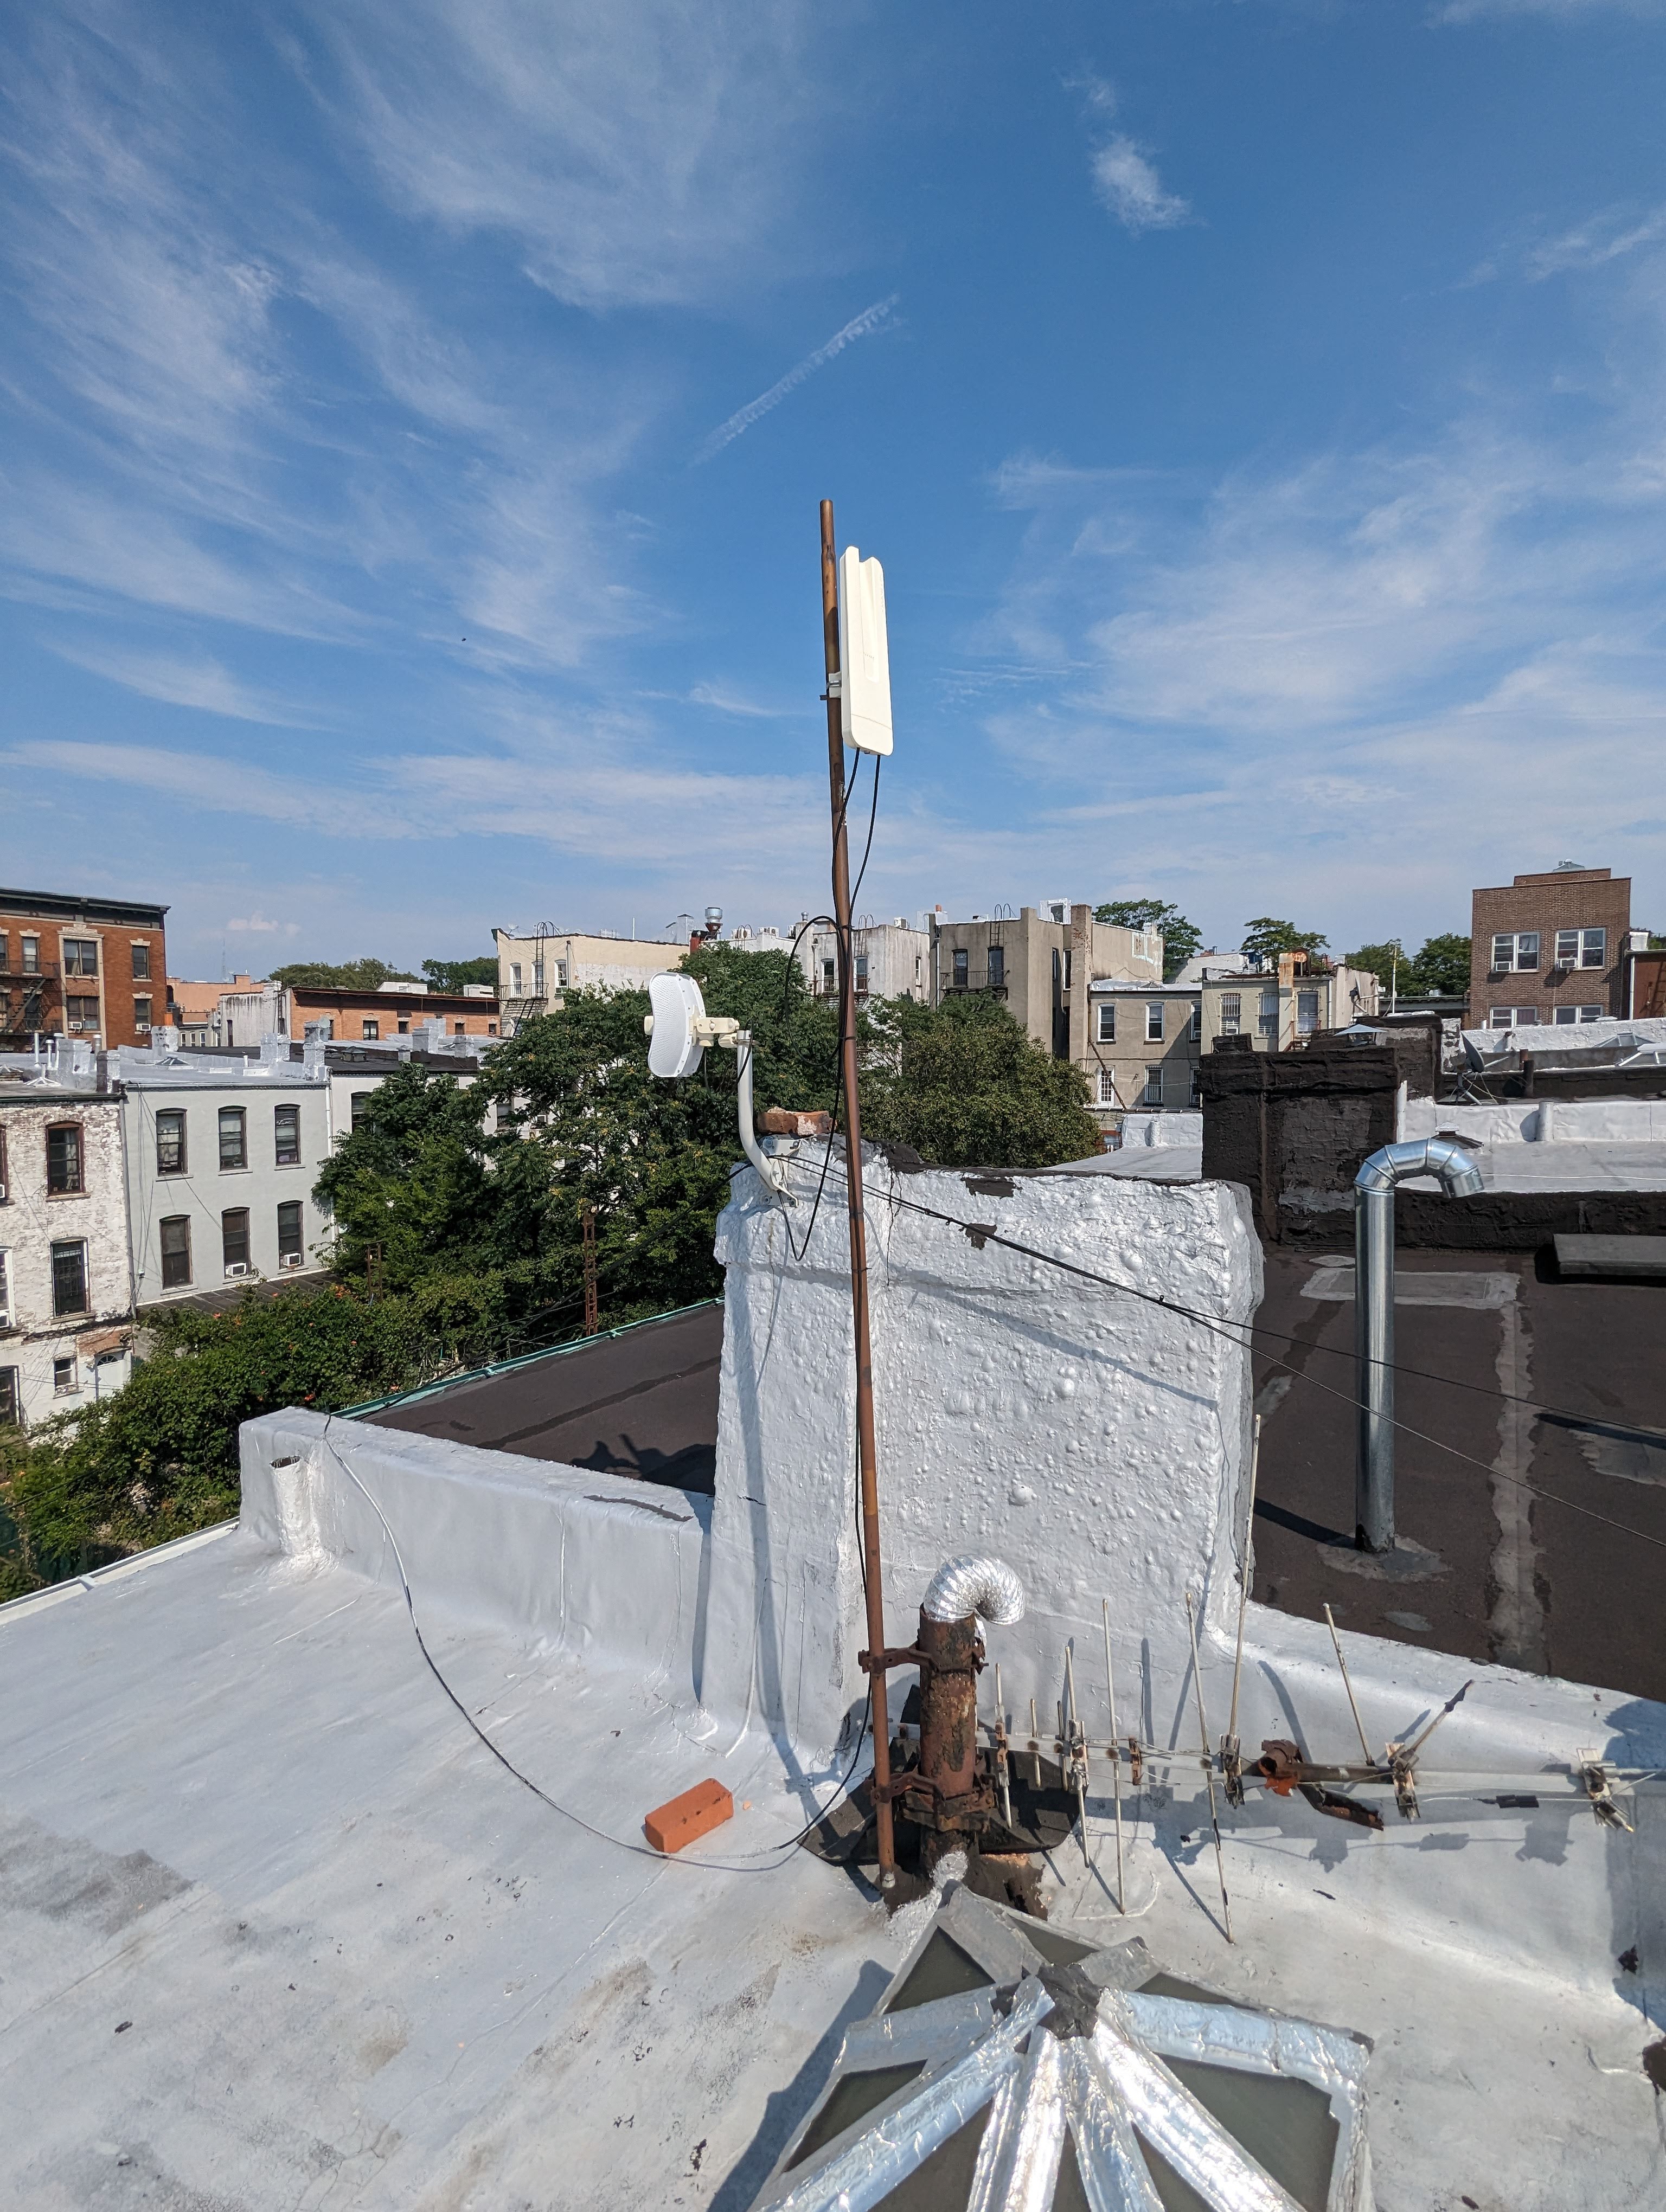
Here are four examples of buildings that have been upgraded with additional equipment to support more connections.
Fiber Connected Buildings:
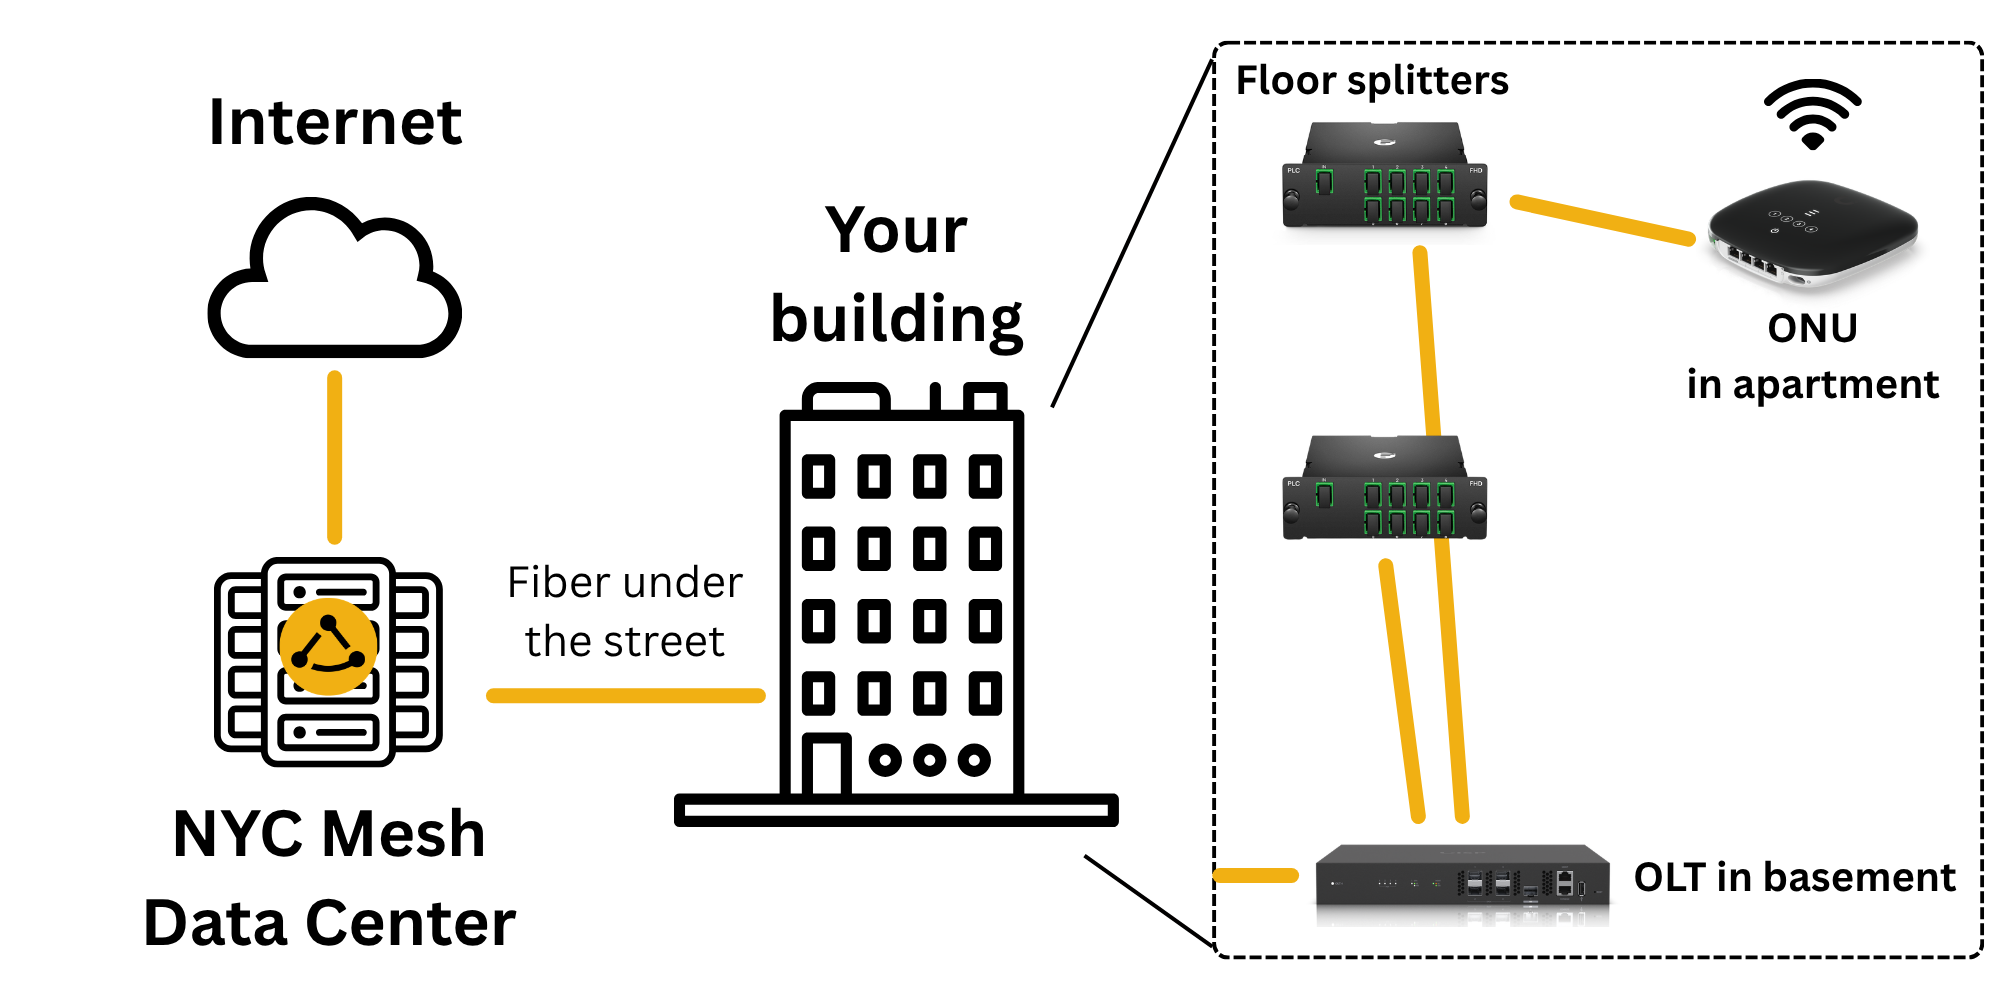
Many larger mesh buildings are now being connected with "Fiber to the Home" (FTTH) connections. This means there a dedicated fiber cable running under the street between one of our data centers and the building. This usually means that we've also connected the apartments with fiber as well, so that each apartment has a 100% fiber optic path all the way from their apartment back to our data center.
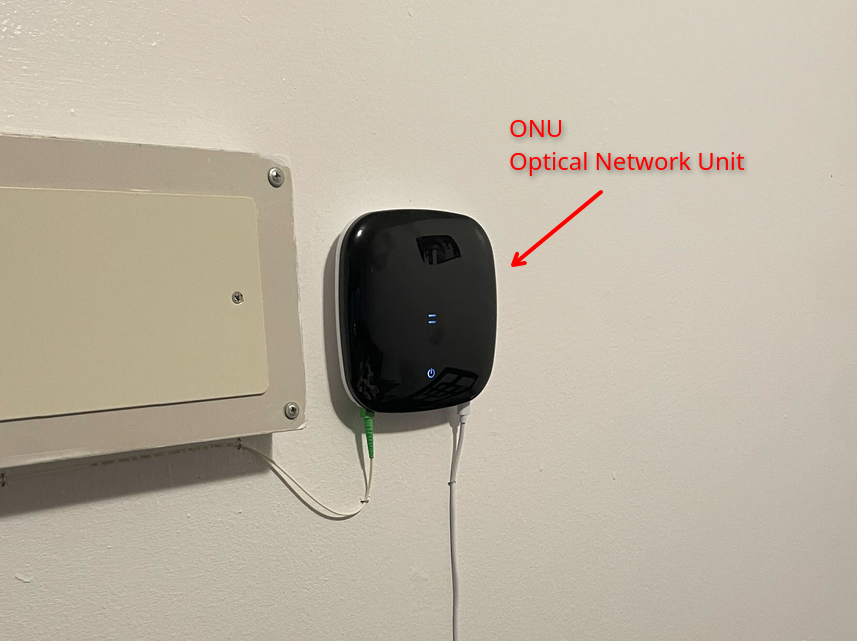
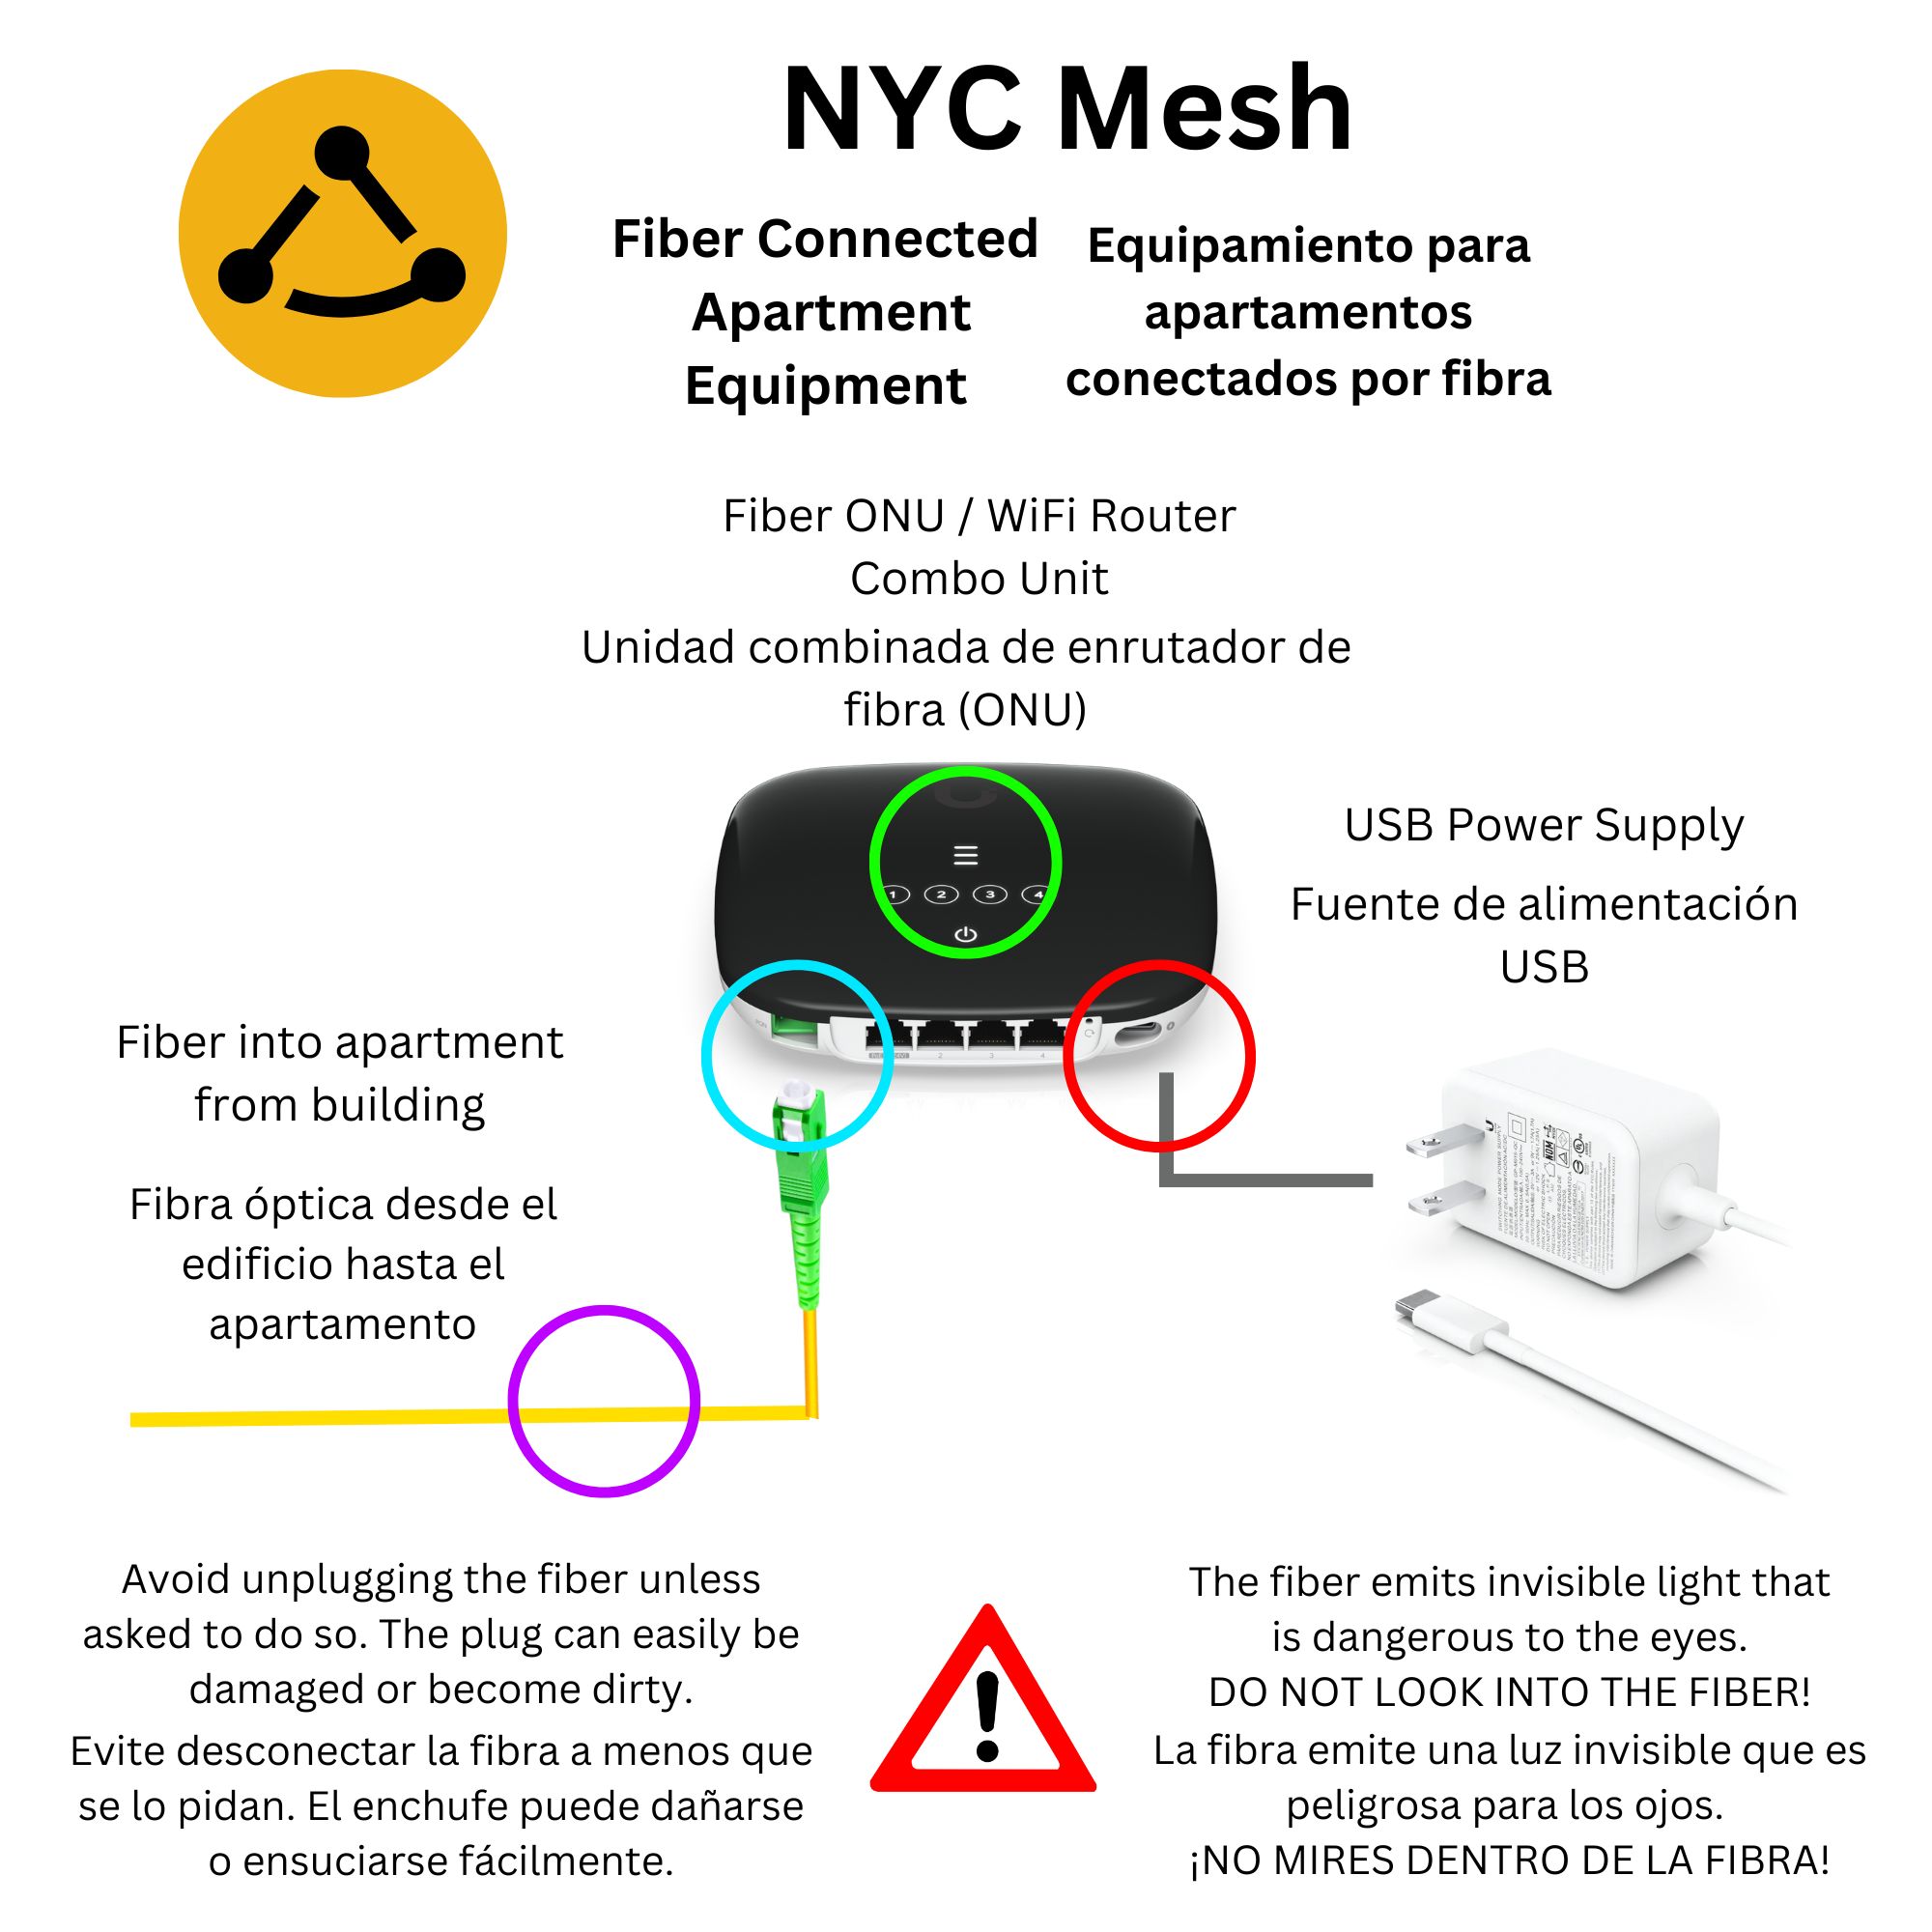
Currently, all fiber connected buildings on the Mesh use Ubiquiti GPON or XGPON equipment. These use a device called an ONU (Optical Network Unit) installed in each apartment connected to a head end unit called a OLT (Optical Network Terminal) in a centrally located rack.
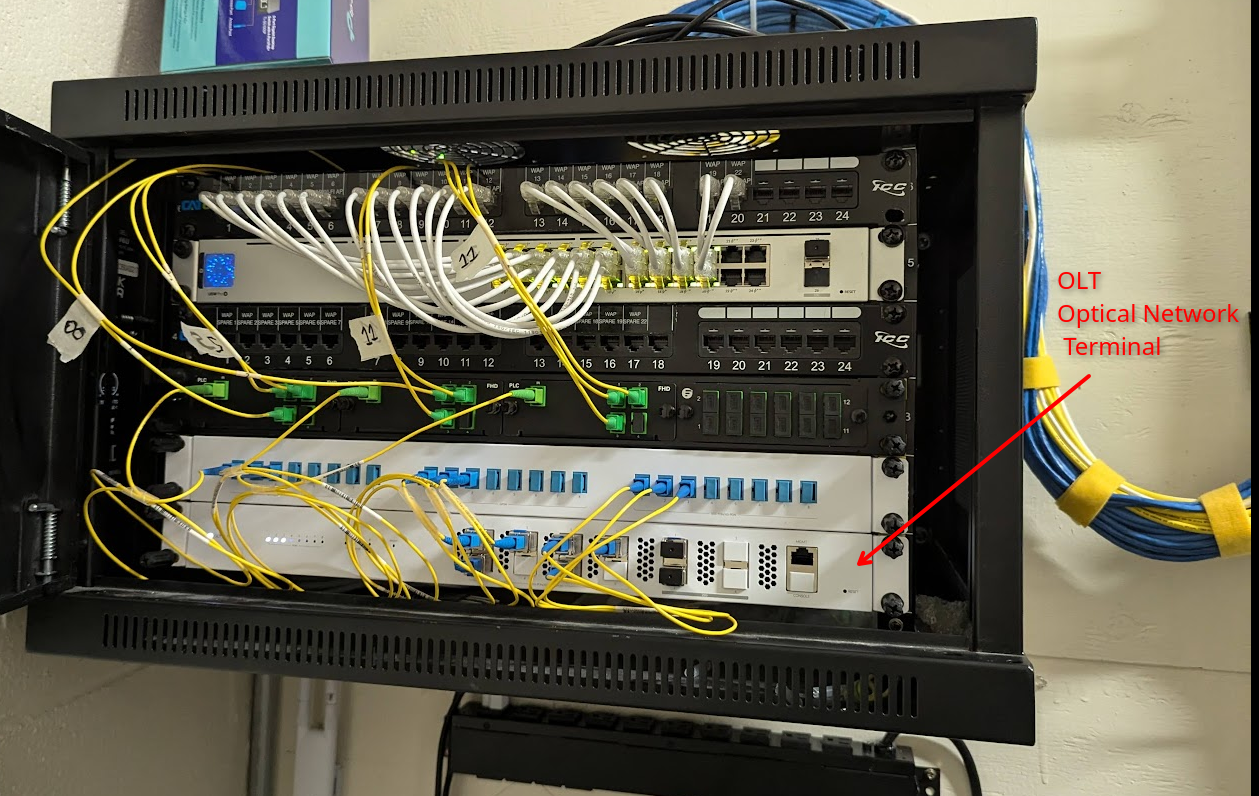
The OLT and ONU devices are connected together with fiber optic cables. These use a hair-thin strand of glass fiber, which is surrounded by a protective plastic outer coating. This glass fiber is so thin that the cable is flexible and can be bent and coiled (within limits, it will break if bent too sharply).
Because the signal is sent as a laser (light) traveling through the glass fiber, these cables can carry data for very long distances without issues caused by signal loss or interference.
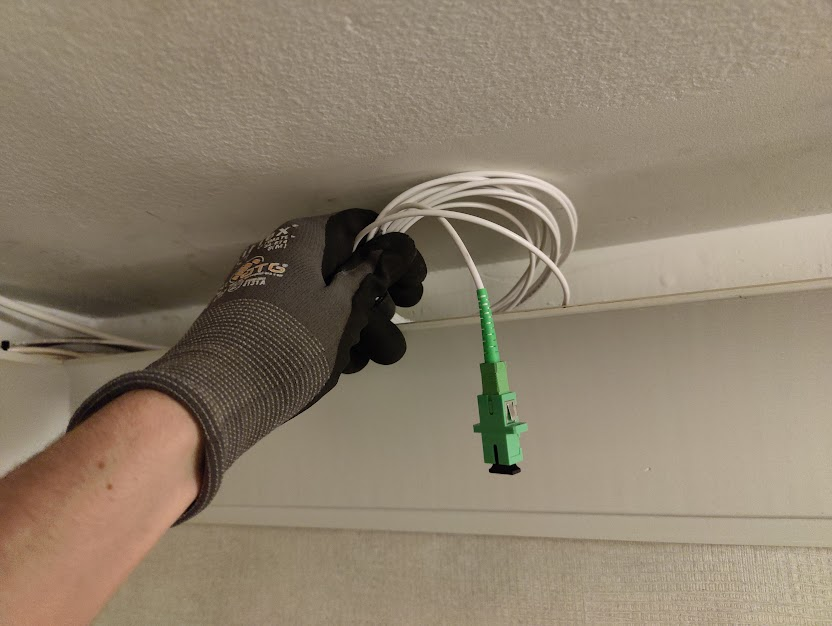
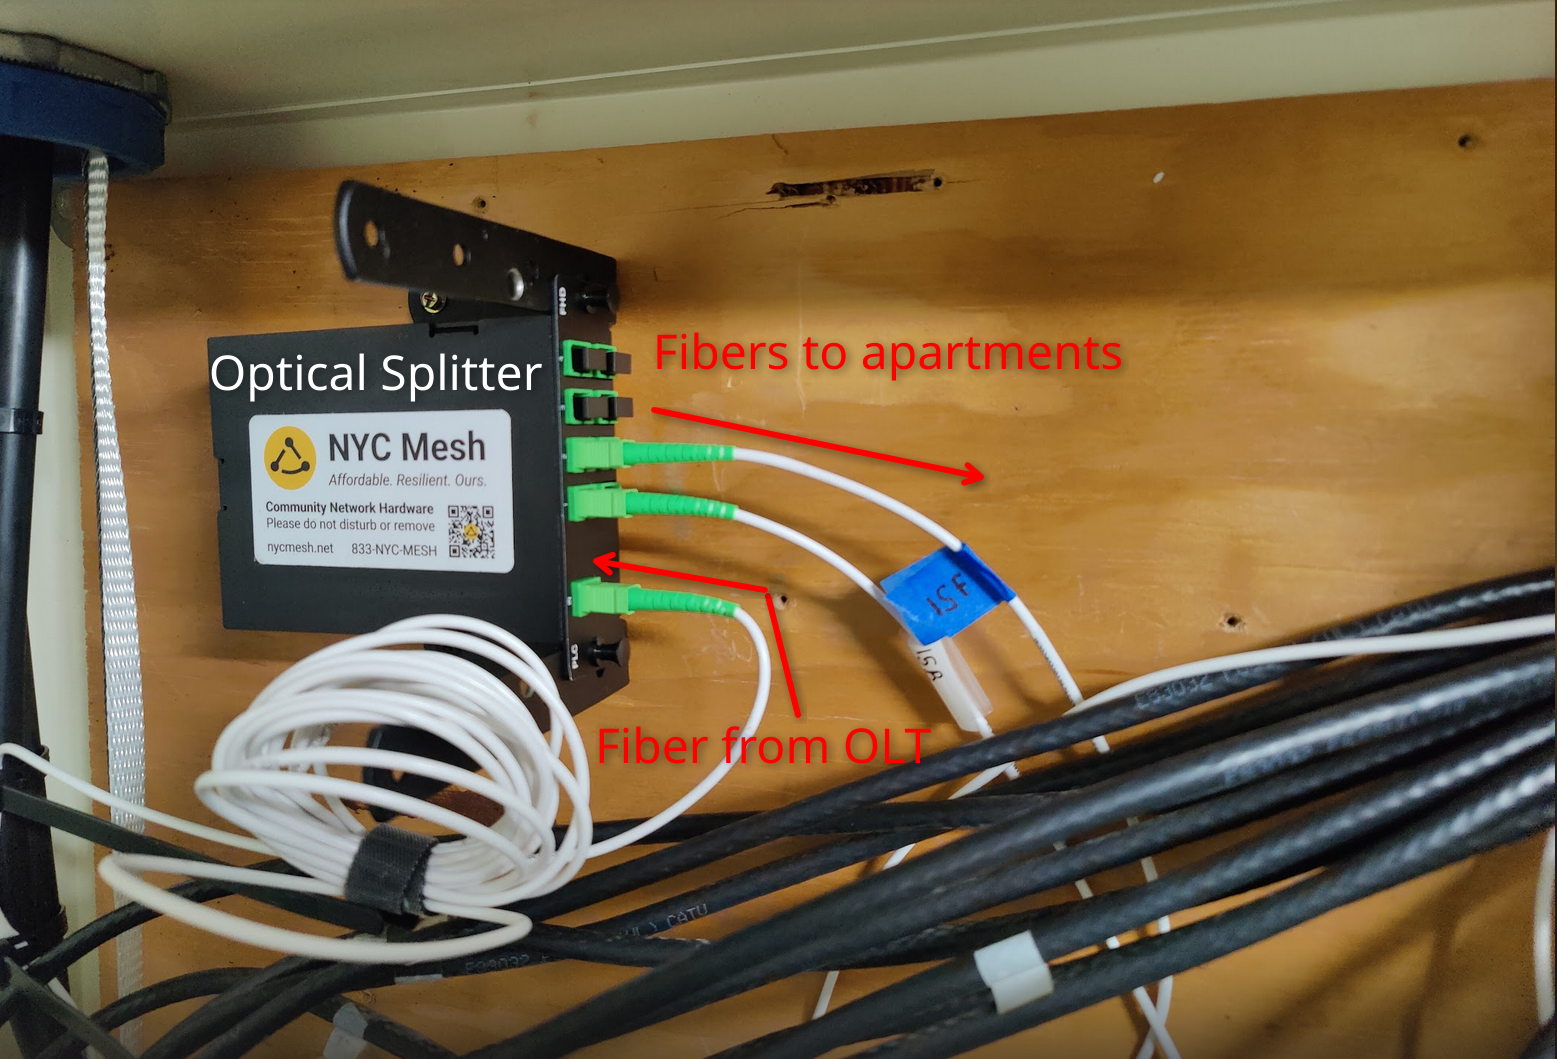
Between the fiber OLT in the equipment rack and each apartment, there are a number of optical splitters, that split the signal into multiple fibers. These splitters use prisms to split the laser light in the fiber, so they don't require any power. This means they can easily be installed in stairways, garbage chutes or other utility areas of buildings without access to an electrical outlet. We typically have one splitter per floor. One fiber runs from the basement to the splitter on each floor, then a fiber runs from the splitter to each individual apartment on that floor.
In each connected apartment, the ONU broadcasts a WiFi network for the member to connect their devices. The ONU may also have several ethernet ports to allow connected wired devices or another home WiFi router if desired.
Full Building Installs (Sometimes called "Managed Installs"):
Section in progress
No comments to display
No comments to display